
Transforming a vintage or secondhand dresser into a functional, custom bathroom vanity is one of the most rewarding DIY projects a homeowner can undertake. It saves substantial money compared to high-end retail vanities and infuses your bathroom with authentic character, warmth, and structural uniqueness.
However, jumping into this project without a strategic blueprint can result in compromised structural integrity, ruined drawers, and catastrophic water damage. To help you succeed, this comprehensive masterclass covers everything you need to know about how to turn a dresser into a bathroom vanity, taking you from structural vetting to advanced plumbing retrofitting and high-end moisture proofing.
Assessing and Selecting the Perfect Dresser
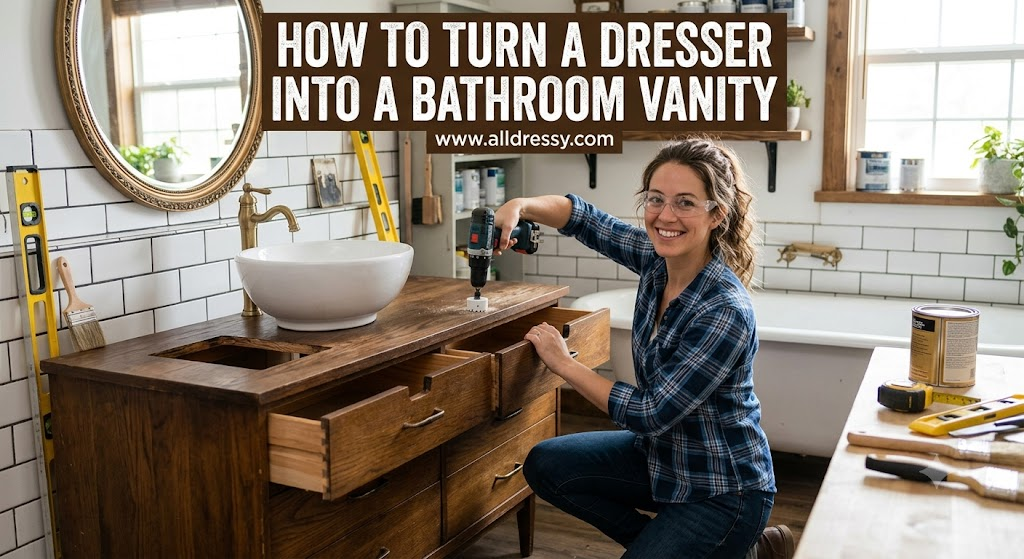
The success of your bathroom transformation hinges entirely on selecting the right piece of furniture. Not every piece of antique furniture or thrift-store find can withstand the modifications required to support a plumbing system and moisture-heavy environment.
1. Structural Dimensions and Ergonomics
Standard modern bathroom vanities stand between 32 and 36 inches tall. When evaluating a vintage piece, remember that older furniture was often constructed significantly lower, sometimes between 28 and 30 inches.
- For Under-Mount or Drop-In Sinks: Aim for a dresser that stands between 34 and 36 inches high. This ensures comfortable everyday use without forcing you to bend over awkwardly to wash your hands.
- For Vessel Sinks: Look for a shorter dresser, ideally between 30 and 32 inches. Because a vessel sink sits completely on top of the surface, its rim will add another 4 to 6 inches of height. Combining a tall dresser with a vessel sink will make the basin uncomfortably high for most users.
- Depth and Width Constraints: The dresser must have a minimum depth of 18 inches (ideally 20 to 22 inches) from front to back. Standard sink basins require a cutout area of at least 14 to 16 inches, leaving just enough structural clearance at the front and back borders for stability and faucet installation.
2. Material Integrity vs. Engineered Wood
Strictly avoid furniture made of compressed particleboard, fiberboard (MDF), or thin laminate veneers. Bathrooms are high-humidity zones subject to direct water exposure. If water penetrates a nicked laminate surface or unsealed MDF edge, the underlying compressed wood fibers will swell, flake, and lose structural integrity.
Seek out furniture made from solid hardwoods like oak, maple, walnut, cherry, or solid birch. Examine the joinery; high-quality vintage dressers feature dovetailed drawer joints and solid wood interior framing supports rather than staples or plastic brackets.
Tools and Materials Checklist
Before making your first incision, gather these specific tools and materials to ensure a smooth workflow.
Power and Hand Tools
- Jigsaw (equipped with a fine-toothed wood blade)
- Drill/Driver combo with a 1-inch spade bit or Forstner bit
- Oscillating multi-tool (highly recommended for tight interior cuts)
- Pneumatic brad nailer or a standard hammer with finishing nails
- Orbital sander with 80-grit, 120-grit, and 220-grit sanding discs
- Sliding T-bevel and a reliable combination square
- Digital stud finder
Construction and Plumbing Supplies
- Waterproof wood glue (Type III PVA)
- 1×2 and 1×4 select pine or poplar boards (for rebuilding drawer boxes)
- 100% silicone mold-resistant plumbing caulk (clear or color-matched)
- Heavy-duty marine-grade polyurethane or a specialized wood hardener coating
- Flexible P-trap kit or a spacesaving plastic drain trap setup
- Braided stainless steel supply lines
- Cabinet levelers or heavy-duty wood shims
Step-by-Step Instructions on How to Turn a Dresser into a Bathroom Vanity
Step 1: Pre-Demolition and Component Mapping
Begin by removing all the drawers and internal shelves from the dresser frame. Inspect the interior framework. Most well-constructed dressers feature horizontal drawer dividers and wooden runner tracks running down the center or sides.
Bring the dresser into your bathroom space or carefully map out the exact location of your wall plumbing. Measure the distance from the bathroom floor to the center of the drain pipe coming out of the wall, as well as the width spanning the hot and cold water shut-off valves. Mark these exact measurements onto the rear backing panel of your dresser using a wax pencil or carpenter’s square.
Step 2: Modifying the Back Panel for Plumbing Access
Instead of cutting away the entire backing material—which can compromise the lateral stability of the dresser—aim to cut localized access portals.
- Using your mapped plumbing dimensions, trace a rectangle or series of circles around the targeted drain and water line zones.
- Drill a starter hole inside your marked boundary using a 1-inch spade bit.
- Insert your jigsaw blade into the starter hole and cleanly cut out the access panel. Sand the edges with 120-grit sandpaper to remove raw splinters that could rip or puncture your flexible plumbing lines later on.
Step 3: Preparing the Countertop Top Layout
Your choice of basin determines how you will modify the top surface of the dresser.
+-------------------------------------------------------------+
|                     COUNTERTOP CUTOUT TYPES                 |
+-------------------------------------------------------------+
|  DROP-IN SINK             VESSEL SINK        UNDER-MOUNT    |
|  (Large Rim Cutout)    (Small Drain Hole)   (Professional)  |
|     _______                  _                 _______      |
|    |       |                | |               |       |     |
|   /         \               | |              |         |    |
|  |___________|              |_|              |_________|    |
+-------------------------------------------------------------+
- For Drop-In Sinks: Place the plastic or cardboard template provided by the manufacturer directly onto the top wood panel. Center it carefully, taking into consideration the required gap behind the basin for the faucet deck. Trace the template line. Drill a 1/2-inch starter hole inside the waste area, then use your jigsaw to follow the traced line around the perimeter.
- For Vessel Sinks: You do not need a massive cutout hole. Instead, place the basin on top, mark the precise center drain opening, and use a hole saw attachment on your drill to create a clean, circular 2-inch to 3-inch portal for the drain flange assembly. Then, measure and drill a separate hole for your top-mount single-handle or widespread faucet.
- For Under-Mount Sinks: If you plan to retain the wood top, you must use a plunge router with a flush-trim bearing bit to create an exceptionally clean, finished edge profile. Alternatively, completely pry off the original wooden top with a flatbar and hand the raw dresser frame over to a local stone fabricator to template a custom granite, quartz, or marble slab.
Step 4: Retrofitting and Rebuilding Drawer Boxes
The most challenging aspect of learning how to turn a dresser into a bathroom vanity is preserving storage space while navigating the physical footprint of the sink bowl and P-trap assembly. You do not have to glue all your drawer faces shut; with simple wood joinery, you can convert standard drawers into U-shaped storage systems.
+-------------------------------------------------------+
|          U-SHAPED DRAWER MODIFICATION SCHEMATIC       |
+-------------------------------------------------------+
|                                                       |
|   +---------------------+   +---------------------+   |
|   |                     |   |                     |   |
|   |   Left Storage      |   |   Right Storage     |   |
|   |   Compartment       |   |   Compartment       |   |
|   |                     |   |                     |   |
|   +-----------+         |   |         +-----------+   |
|               |         |   |         |               |   |
|               |  Plumbing   Channel   |               |   |
|               |  (Open Clearance)     |               |   |
|               |         |   |         |               |   |
|               +---------+   +---------+               |
|                                                       |
+-------------------------------------------------------+
- Measure the Obstruction Zone: Re-insert the raw wood drawer frames into the dresser chassis. Measure the distance from the inside front face of the drawer box to the front edge of the installed sink bowl and plumbing pipes.
- Cut the Trough Profile: Remove the drawer and use a circular saw or jigsaw to slice through the drawer bottom and back panel, removing the center rectangle that conflicts with the plumbing lines.
- Construct New Inner Walls: Cut small strips of 1×4 pine boards to match the height and newly shortened depth of the drawer sides. Run a bead of waterproof wood glue along the edges, clamp them into place to close the open sides of the U-shaped cutout, and reinforce the joints using a brad nailer.
- Reinforce the Under-Carriage: Run a 1.5-inch wide structural wood support strip across the underside of the newly modified drawer bottom, anchoring it firmly to the side walls to prevent the drawer bottom from sagging or warping under weight over time.
- Address the Top Drawer: In many instances, the top drawer box will directly collide with the deepest part of the sink basin. If space is too tight for a U-shaped modification, remove the drawer box entirely using an oscillating multi-tool. Take the original drawer front and permanently mount it to the face of the dresser frame using pocket hole screws or internal corner brackets, turning it into a beautiful, static decorative false front panel.
Moisture-Proofing and Deep Surface Protection
A converted wooden dresser will quickly succumb to wood rot, discoloration, peeling paint, and joint separation if it isn’t properly treated to resist water.
Advanced Prep: Wood Bleaching and Neutralizing
If you have sanded a vintage piece down to bare wood and notice deep tannin staining, water rings, or inconsistent grain coloration, apply a two-part wood bleaching kit (containing sodium hydroxide and hydrogen peroxide). This chemical process lifts color anomalies without damaging the structural integrity of the hardwood fibers. Always neutralize the wood with a 1:1 mixture of white vinegar and water afterward, allowing it to dry completely for 48 hours before applying finishes.
The Ultimate Waterproof Barrier Matrix
Do not rely on standard interior clear wax or basic aerosol spray paint to protect your newly built vanity. Instead, select a finish designed for marine environments or heavy-use horizontal surfaces.
| Coating Type | Application Method | Best Used For | Pro-Level Benefit |
| Marine Spar Urethane | Apply minimum 3 coats using a natural bristle brush, sanding lightly with 220-grit paper between coats. | Natural wood tops, raw wooden drawer interiors, and exterior side panels. | Contains advanced UV inhibitors and flexible resins that allow wood to expand and contract without cracking the protective barrier. |
| Waterborne Alkyd Enamel Paint | Apply 1 coat of shellac-based primer, followed by 2 coats of self-leveling alkyd finish using a high-density foam roller. | Painted dresser chassis, front frames, and legs. | Cures to a rock-hard, porcelain-like finish that repels standing water and withstands scrubbing. |
| Two-Part Clear Epoxy Resin | Pour and spread evenly over a completely flat, leveled wooden top surface using a plastic notched spreader. | High-risk natural wood countertops subject to severe splashing. | Creates an absolute, glass-like impermeable shell that completely seals out moisture. |
Final Installation and Plumbing Integration
Once your finishes are fully cured and dry, it is time to move the vanity into its permanent home.
1. Anchoring to Wall Studs
A bathroom vanity cannot simply sit loosely against the wall like a bedroom dresser. The mechanical forces of opening drawers, leaning against the basin, and the weight of water require a permanent, structural connection.
- Slide the modified vanity frame into place against the wall. Use an accurate spirit level across the top surface from left-to-right and front-to-back. If your bathroom floor slopes, place adjustable heavy-duty leveling feet onto the base of the legs or drive solid hardwood shims underneath until the top is perfectly level.
- Locate the vertical wall studs using a digital stud finder.
- Add a solid 1×4 wood mounting cleat across the inside upper back framework of your dresser.
- Drive 3-inch heavy-duty cabinet screws through this internal wood cleat, straight through the dresser back panel, and securely into the center of the wall studs.
2. Mounting the Sink and Faucet
Before dropping your sink into place, install the faucet assembly and drain flange onto the basin while you still have unobstructed access. Attempting to tighten faucet mounting nuts inside a cramped, dark dresser cavity is incredibly difficult.
Apply a generous, continuous bead of 100% silicone plumbing caulk around the underside edge of your sink rim or along the top circumference of the cutout hole. Lower the sink into position. Use a damp microfiber cloth to immediately clean away any excess silicone squeeze-out. If using an under-mount setup, secure the sink to the underside wood or stone framing using epoxy-set anchors and heavy-duty sink clips.
3. Final Hookups and Pressure Testing
With the vanity secured and the sink set, bring your plumbing lines together. Connect your hot and cold braided lines to the faucet connections, ensuring you do not overtighten and strip the internal rubber seals.
Assemble your P-trap configuration. Because a converted dresser may sit slightly offset from your original wall waste lines, you may need to use an adjustable extension tube or a custom-cut slip-joint connector to bridge the gap cleanly. Avoid the temptation to use corrugated, flexible accordion-style drain pipes; their interior ridges accumulate hair, soap scum, and debris, leading to chronic clogging and foul odors.
Open the main water valves slowly and monitor all connection points carefully. Run the faucet continuously for five minutes while examining the internal drawer clearances, drain joints, and rear cutouts to guarantee a completely leak-free system.
Frequently Asked Questions
Can you convert a dresser made of veneer or MDF into a vanity?
It is highly discouraged. MDF (Medium-Density Fiberboard) and thin wood veneers absorb moisture like a sponge. If water gets past the top laminate layer, the underlying engineered material will swell, bubble, and disintegrate. Always stick to solid hardwoods or high-quality plywood construction for bathroom environments.
How do I stop the wooden top of the dresser from rotting over time?
The secret lies in the quality and application of your topcoat. You must apply a minimum of three to four coats of a marine-grade spar urethane or a two-part clear epoxy resin. These finishes form an impermeable barrier that prevents standing water from reaching the raw wood fibers. Additionally, wiping up heavy puddles after use will extend the life of the wood indefinitely.
What do I do if the plumbing doesn’t line up with the dresser drawers?
You have two main choices: modify the drawer boxes into a U-shape around the pipes, or turn the drawer into a non-functional false front. If you want to keep the storage space, shortening the drawer length and rebuilding the rear panel allows the plumbing to pass behind it without hitting the drawer slide mechanics.
Do I need a special type of sink for a dresser conversion?
No, you can use drop-in, under-mount, or vessel sinks. However, vessel sinks are often the easiest choice for DIYers because they only require a small 2-inch to 3-inch hole for the drain pipe, leaving the rest of the dresser’s top surface structurally intact.
How do I attach a stone or quartz top to a wooden dresser frame?
If you are replacing the wooden top with stone, pry off the original wood top first. Clean the top edges of the raw dresser frame, apply a heavy, continuous bead of premium construction adhesive or 100% silicone sealant directly to the wood frame, and carefully lower the stone slab into position. The weight of the stone combined with the silicone will lock it permanently in place.
Conclusion
Learning how to turn a dresser into a bathroom vanity is a fantastic way to break away from mass-produced retail cabinets and inject true architectural style into your home. By taking the time to carefully measure your space, reinforce the internal framing, alter the drawer boxes with precision, and seal every square inch against humidity, you create a piece of furniture that is as functional as it is beautiful. With the right tools and a patient approach to the plumbing retrofits, your custom vanity will serve as a durable, leak-free centerpeice of your bathroom for decades to come.