
Learning how to draw a princess dress can be an exciting way to improve your fashion illustration skills and create beautiful character designs. Princess dresses often feature elegant silhouettes, fitted bodices, flowing skirts, decorative sleeves, sparkling details, layered fabrics, and dramatic shapes. Even if you are a beginner, you can learn to draw a convincing princess dress by breaking the design into simple shapes and gradually adding details.
A good princess dress drawing does not have to begin with complicated artwork. The most important part is understanding the basic structure of the garment. Once you know how to sketch the bodice, waistline, skirt, sleeves, neckline, folds, and decorative elements, you can create many different princess dress designs.
This guide explains how to draw a princess dress from the first rough sketch to the final details. It also covers proportions, fabric folds, realistic volume, color choices, different princess dress styles, common drawing mistakes, and ways to make your artwork look more polished.
How to Draw a Princess Dress: Start With the Basic Shape
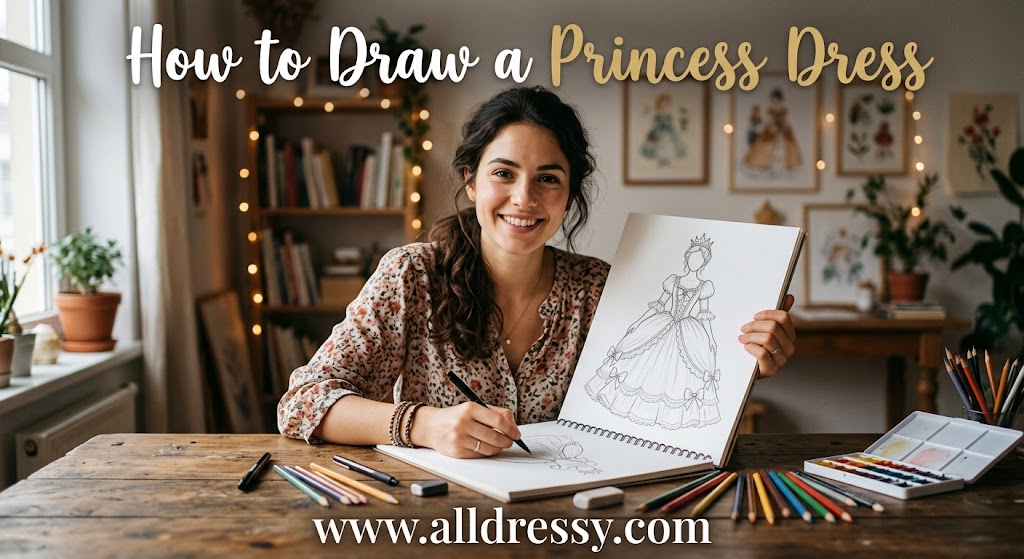
Before adding lace, jewels, ribbons, or other decorations, begin with the overall silhouette.
A princess dress usually has two major sections:
- The fitted upper bodice
- The fuller lower skirt
The bodice generally follows the shape of the character’s torso, while the skirt expands outward from the waist.
Start with a very light sketch. Draw a vertical center guideline to help keep the dress symmetrical. Then mark the approximate positions of the shoulders, bust, waist, hips, and bottom of the skirt.
You do not need to make these lines perfect because they will eventually be erased or covered.
How to Draw the Princess Dress Bodice
The bodice is one of the most important parts of a princess dress.
Begin by sketching the character’s upper body. The neckline can then be placed according to the style you want.
Some common princess-dress necklines include:
- Sweetheart neckline
- Square neckline
- V-neckline
- Off-the-shoulder neckline
- High neckline
- Boat neckline
- Scoop neckline
For a traditional fairytale appearance, a sweetheart or square neckline can create an elegant silhouette.
Keep the bodice narrower than the skirt. The waist should provide a clear transition between the fitted upper section and the fuller lower section.
How to Draw a Princess Dress Waistline
The waistline determines how the skirt begins.
A princess dress can have a natural waist, raised waist, dropped waist, or decorative waistband.
For a classic design, draw a clearly defined waist and then expand the skirt outward.
You can add a belt, ribbon, jeweled waistband, embroidery, or another decorative element around this area.
Avoid making the waistline completely straight if you want the garment to look natural. The shape should follow the character’s body and the structure of the clothing.
How to Draw a Full Princess Skirt
The skirt is often the most recognizable part of a princess dress.
Start at the waist and gradually expand the skirt toward the floor. Think of the skirt as a large cone or bell shape rather than drawing it as a flat triangle.
The bottom edge can be slightly uneven because fabric naturally creates curves and folds.
For a dramatic ball-gown style, make the skirt very wide. For a simpler princess dress, use a moderate amount of volume.
How to Draw a Princess Dress With Layers
Layered skirts can make a princess dress look more detailed and luxurious.
Start with the main skirt silhouette. Then add one or more additional layers.
Each layer should follow the overall direction of the skirt.
For example, you can create:
- A smooth outer layer
- A ruffled middle layer
- A decorative underskirt
- A sheer overlay
- A scalloped hem
- A lace border
Do not make every layer identical. Slight differences in shape and placement can make the garment appear more natural.
How to Draw Princess Dress Sleeves
Sleeves can completely change the character of a princess dress.
Popular options include:
Long Sleeves
Long sleeves create an elegant or traditional appearance. Draw the sleeve following the arm before adding fabric volume.
Puff Sleeves
Puff sleeves are excellent for fairytale-inspired designs. Start with a rounded shape around the upper arm and narrow the sleeve toward the lower arm.
Bell Sleeves
Bell sleeves widen toward the wrist. They work particularly well with fantasy and historical-inspired dresses.
Off-the-Shoulder Sleeves
These sleeves sit below the shoulders and can create a graceful formal appearance.
Short Sleeves
Short sleeves are easier for beginners and work well with simpler princess dress designs.
How to Draw a Princess Dress Neckline
The neckline should complement the rest of the design.
A sweetheart neckline can be created by drawing two gentle curves meeting near the center of the chest.
For a square neckline, use straighter lines with slightly softened corners.
A V-neckline begins higher near the shoulders and angles toward the center.
When drawing the neckline, remember that it should follow the body’s perspective. Avoid making it look like a flat symbol placed on top of the character.
How to Draw a Princess Dress Corset
A corset-style bodice can add structure to a princess dress illustration.
Begin by defining the outer edges of the bodice. Then add vertical seam lines following the body’s shape.
You can also include:
- Decorative lacing
- Embroidery
- Beaded edges
- Panels
- Small buttons
- Ribbon details
Keep the details aligned with the body’s perspective. Curved seam lines can help the bodice appear three-dimensional.
How to Draw Princess Dress Fabric Folds
Fabric folds are essential for making a dress look realistic.
Do not randomly scatter lines throughout the skirt. Instead, consider where the fabric is being pulled, compressed, or hanging freely.
At the waist, folds usually begin near areas where the fabric gathers.
As the folds move downward, they can become longer and more widely spaced.
Some folds can curve slightly to show the direction of the fabric.
How to Draw a Flowing Princess Dress
For a flowing dress, focus on movement.
Imagine air or motion passing through the skirt. Some sections of fabric may move outward while others remain closer to the body.
Start with the basic silhouette, then add curved fold lines that follow the movement.
Avoid outlining every fold with a dark line. A combination of larger shapes and subtle interior lines usually produces a more natural result.
How to Draw a Princess Dress From the Side
A side-view princess dress requires a different silhouette.
Start by drawing the character’s body from the side. The bodice should follow the torso, while the skirt extends outward from the waist.
The back of the skirt can be made longer for a train.
Pay attention to how the fabric overlaps. From the side, you can show multiple layers more clearly.
How to Draw a Princess Dress From the Back
A back-view design provides an opportunity to showcase a large bow, decorative train, back neckline, or intricate fabric details.
Begin with the character’s shoulders and torso. Define the waist before expanding the skirt.
For a dramatic princess gown, add a long train extending behind the character.
The train should follow the floor rather than appearing to float without support.
How to Draw a Princess Dress With a Train
A train adds drama to a formal princess dress.
First, draw the main skirt. Then extend additional fabric from the back.
The train can be:
- Short
- Medium-length
- Long
- Cathedral-style
- Rounded
- Pointed
- Layered
Use long curved folds to show how the fabric spreads across the ground.
Avoid making the train look like a rigid extension of the skirt. It should appear to rest naturally on the floor.
How to Draw a Princess Dress With a Bow
A large bow can make a princess dress look playful and decorative.
Draw the center knot first. Then create two large loops on either side.
Add long ribbon tails extending downward or outward.
The loops should have visible folds and curved edges. This gives the bow volume instead of making it look like a flat shape.
How to Draw a Princess Dress With Lace
Lace is a detailed feature, so it is usually best added after the main dress has been completed.
You can use small repeating patterns around:
- Necklines
- Sleeves
- Waistbands
- Skirt hems
- Bodice panels
Do not cover every surface with lace. Leaving areas of plain fabric helps the decorative sections stand out.
How to Draw a Princess Dress With Sparkles
Sparkles can make a fantasy-inspired dress look magical.
Start by completing the main garment. Then place small decorative shapes across selected areas.
You can use:
- Tiny stars
- Dots
- Diamonds
- Small crosses
- Short light lines
Concentrate sparkles around important areas rather than covering the entire dress equally.
How to Draw a Princess Dress With Jewels
Jewels can be added to the neckline, waist, bodice, or sleeves.
Draw the basic shape of each jewel first. Small diamond or oval shapes can work well.
Use highlights to make the jewels appear reflective.
Avoid adding too many large jewels because they can compete with the overall silhouette.
How to Draw a Princess Dress With Ruffles
Ruffles require repeated curved shapes.
Begin at the location where the ruffle attaches to the dress. Draw a series of overlapping curves extending outward.
Ruffles should not look like identical circles. Vary the curves slightly to create natural fabric movement.
They can be placed around:
- Sleeves
- Necklines
- Waistlines
- Skirt layers
- Hemlines
How to Draw a Princess Dress in Different Styles
There is no single correct princess dress design.
Classic Fairytale Dress
Use a fitted bodice, full skirt, elegant sleeves, and decorative details.
Modern Princess Dress
Use a cleaner silhouette with fewer layers and contemporary details.
Fantasy Princess Dress
Experiment with unusual sleeves, magical accessories, dramatic trains, and imaginative fabrics.
Winter Princess Dress
Add long sleeves, layered skirts, textured fabric, and decorative elements inspired by snow or winter themes.
Garden Princess Dress
Use flowing fabric, floral decorations, lighter silhouettes, and nature-inspired details.
Royal Ball Gown
Create a structured bodice, large skirt, elegant neckline, and long train.
How to Draw a Princess Dress With Realistic Proportions
Good proportions help the dress look connected to the character.
Start with the body rather than drawing a floating dress.
Establish the shoulder width, torso length, waist position, and leg direction before constructing the skirt.
The dress should wrap around the body instead of appearing pasted onto it.
Use guidelines during the initial sketch. These can be erased later.
How to Draw a Princess Dress on a Moving Character
A moving character requires additional attention to fabric behavior.
If the character is walking, the skirt may move backward or sideways.
If the character is turning, the fabric can spread outward.
If the character is standing still, the skirt generally falls more vertically.
Think about the direction of movement before drawing the folds.
How to Add Shadows to a Princess Dress
Shading gives the dress depth.
First identify your imaginary light source. Then determine which areas would receive less light.
Common shadow areas include:
- Under the bodice
- Around deep folds
- Beneath layered fabric
- Behind the skirt
- Under ruffles
- Around overlapping material
Use larger shadow shapes before adding small details.
How to Add Highlights to a Princess Dress
Highlights can make satin, silk, or other shiny materials appear more dimensional.
For a shiny fabric, add controlled bright areas along curved sections.
For matte fabric, use softer and less dramatic highlights.
The type of shading should match the material you are trying to represent.
How to Draw Different Princess Dress Fabrics
Different fabrics behave differently.
Satin
Satin can be represented with smooth folds and strong highlights.
Velvet
Velvet generally has softer highlights and deeper-looking shadows.
Tulle
Tulle can be represented with thin transparent layers and delicate edges.
Silk
Silk tends to have flowing folds and subtle reflective areas.
Lace
Lace is better represented through repeated decorative patterns rather than large solid shapes.
Understanding these differences can make your princess dress illustrations more convincing.
How to Choose Colors for a Princess Dress
Color can communicate the mood of the character.
Traditional choices include pink, blue, purple, white, gold, silver, and red, but there is no requirement to use conventional princess colors.
Try combining a primary color with one or two supporting colors.
For example, you could use a main dress color with a lighter trim and a metallic-looking accent.
Avoid using too many unrelated colors because they can make the design feel visually crowded.
How to Draw a Princess Dress Step by Step for Beginners
If you are completely new to fashion drawing, follow this simplified process:
- Draw the character’s basic body.
- Mark the shoulder and waist positions.
- Sketch the neckline.
- Draw the fitted bodice.
- Establish the waistline.
- Expand the skirt outward.
- Add the bottom hem.
- Draw sleeves if needed.
- Add major folds.
- Add layers or a train.
- Add decorative elements.
- Clean up unnecessary guidelines.
- Add shading.
- Add highlights.
- Apply your chosen colors.
Working in this order prevents small details from interfering with the basic structure.
Common Mistakes When Learning How to Draw a Princess Dress
Beginners often focus too much on decoration before establishing the shape.
Making the Dress Too Flat
A dress should wrap around the body. Add curved lines and appropriate shading to create depth.
Adding Too Many Details
Too many decorations can make the design difficult to read.
Start with the silhouette and add details gradually.
Ignoring Fabric Direction
Folds should generally follow how the fabric hangs or moves.
Making the Skirt Symmetrical Everywhere
Real fabric can have uneven folds and movement. Perfect symmetry is not always necessary.
Forgetting the Character’s Body
The dress needs to fit the body underneath it.
Using Heavy Outlines Everywhere
Very dark outlines around every fold can make the dress look crowded. Use different line weights when appropriate.
How to Make a Princess Dress Look More Elegant
Elegance often comes from simplicity and proportion rather than the number of decorations.
Start with a strong silhouette. Make sure the bodice and skirt work together.
Use decorative details strategically. A beautiful neckline, structured waist, flowing skirt, and carefully placed embellishments can be more effective than covering the entire garment with ornaments.
How to Practice Drawing Princess Dresses
Practice is easier when you break the subject into individual parts.
Spend one session practicing bodices. Another session can focus on sleeves. Then practice skirt shapes and fabric folds.
You can also draw the same dress from different viewpoints.
Try front, side, three-quarter, and back views.
This helps you understand how the garment changes with perspective.
How to Create Your Own Princess Dress Designs
Once you understand the basic construction, start experimenting.
Change the neckline, sleeve length, skirt volume, train, fabric, and decorations.
You can combine different features to create an original design.
For example, a dress could have a structured bodice, puff sleeves, a layered tulle skirt, a jeweled waistband, and a long train.
You can also create designs around a specific character personality or story.
How to Draw a Princess Dress More Professionally
Professional-looking fashion illustrations generally begin with a strong foundation.
Focus on:
- Clean proportions
- Clear silhouettes
- Consistent perspective
- Natural fabric folds
- Controlled details
- Appropriate shading
- Balanced colors
- Intentional decoration
Do not rush to the final stage. A strong rough sketch often produces a better finished illustration than a detailed drawing built on incorrect proportions.
Final Tips for How to Draw a Princess Dress
When learning how to draw a princess dress, remember that the silhouette is the foundation of the entire design. Start with the character’s body, establish the bodice and waist, and then build the skirt outward.
Once the basic shape works, add sleeves, layers, folds, trains, bows, lace, jewels, and other decorative features. Use shading and highlights to give the fabric depth, and choose colors that support the style of the dress.
Most importantly, practice different designs instead of trying to create one perfect drawing immediately. A simple princess dress can teach you the fundamentals of clothing structure, while more elaborate gowns can help you develop advanced skills in fabric, perspective, texture, and fashion illustration.
10 Frequently Asked Questions About How to Draw a Princess Dress
1. How do you draw a princess dress for beginners?
To draw a princess dress for beginners, start with simple shapes. Draw a fitted bodice for the upper part and a large bell-shaped skirt for the lower part. Add the neckline, sleeves, waistline, and hem. Once the basic outline looks correct, include fabric folds, ribbons, lace, and other decorations. Finish by erasing unnecessary guidelines and adding colors.
2. What materials do you need to draw a princess dress?
You can draw a princess dress with a pencil, eraser, paper, and colored pencils or markers. A ruler can help with guidelines, while fine-tip pens are useful for outlining details. If you prefer digital drawing, you can use a drawing tablet or a digital art application.
3. How do you draw a beautiful princess dress step by step?
Start by sketching the character’s body and drawing the bodice. Next, add the waistline and expand the skirt outward. Draw the sleeves and neckline according to your preferred style. Add folds to show how the fabric hangs, then decorate the dress with bows, lace, jewels, or embroidery. Finally, apply shading and colors to create depth.
4. How do you draw a princess dress with a big skirt?
Begin at the waist and draw two curved lines that expand outward toward the bottom. Connect them with a wide, curved hemline. Add long folds that extend from the waist toward the hem. To make the skirt look fuller, include additional fabric layers, soft shadows, and highlights.
5. How do you draw a princess dress with a corset?
Draw a fitted bodice that follows the character’s upper body. Define the neckline and waist, then add vertical seam lines to suggest the corset’s panels. You can include decorative lacing, small buttons, embroidery, or jewels. Use subtle shading around the seams to give the bodice a three-dimensional appearance.
6. What is the easiest princess dress style to draw?
A simple princess dress with a rounded neckline, short sleeves, fitted bodice, and flowing A-line skirt is a good starting point. This design uses basic shapes and requires fewer decorative details. After practicing the simple version, you can experiment with puff sleeves, layered skirts, bows, and longer trains.
7. How do you draw realistic folds in a princess dress?
Begin by identifying where the fabric gathers, such as the waist, sleeves, and seams. Draw curved or tapered lines extending from these areas toward the hem. Use darker shading inside deeper folds and lighter areas on raised sections. Avoid adding too many lines because excessive folds can make the fabric look confusing.
8. What colors should you use when drawing a princess dress?
You can choose any colors that suit your design. Pink, blue, purple, white, gold, and silver are popular choices for fairytale-inspired illustrations. Use one main color with complementary or contrasting accents. Add lighter shades for highlights and darker shades for shadows to make the dress appear more dimensional.
9. How do you draw a princess dress with a long train?
First, draw the main skirt and establish the direction in which the character is facing. Extend additional fabric from the back of the skirt, allowing it to spread across the floor. Add long, flowing folds that follow the shape of the train. Use overlapping lines and soft shadows to show the fabric’s depth.
10. How can you improve your princess dress drawing skills?
Practice drawing different bodices, sleeves, skirt shapes, and fabric textures separately. Study how clothing folds around the body and how fabric behaves when a character stands, walks, or turns. Experiment with different colors and silhouettes, and compare your sketches to identify areas for improvement. Regular practice will help you develop more confident lines and original designs.
Conclusion
Learning how to draw a princess dress is a creative way to develop your drawing skills and explore fashion illustration. By starting with simple shapes and gradually adding details, you can create beautiful designs without feeling overwhelmed by complicated patterns or decorations.
Begin with the bodice, define the waistline, and draw a skirt that matches your chosen style. Then add sleeves, fabric folds, layers, bows, lace, jewels, and other decorative elements. Use shading and highlights to create depth, and select colors that bring your design to life.
Whether you want to draw a simple princess dress for a beginner’s art project or create an elaborate royal ball gown, understanding proportions, fabric movement, and garment structure will help you achieve better results. Keep practicing different styles, experiment with your own ideas, and enjoy the process of turning a simple sketch into a beautiful princess dress illustration.