The difference between a dress that looks hastily thrown together and one that exudes couture elegance often comes down to the smallest details. Among these styling elements, none is more visually striking—or more frequently botched—than the waist sash, neckline ribbon, or shoulder tie. Mastering how to tie a bow for a dress elevates your wardrobe, ensures structural security throughout the day, and creates clean, symmetrical lines that complement your body shape.
Many people treat a dress sash like a pair of shoelaces, resulting in a floppy, lopsided knot where one loop points upward, one tail twists backward, and the entire structure sags under its own weight. Tying a flawless garment bow requires specific tension control, directional fold mechanics, and an understanding of how different textiles behave under pressure. This comprehensive guide details the precise, step-by-step methods needed to execute flat, architectural bows, asymmetrical half-bows, and specialized knots for every dress silhouette.
1. The Physics of a Flat Bow: Understanding Fabric Behavior
Before attempting to loop your sash, you must evaluate the fabric you are working with. The texture, weight, and weave of a ribbon dictate how it holds friction, how much volume the loops will occupy, and how the tails will drape against the skirt of your dress.
Grosgrain and Textured Ribbons
Grosgrain is characterized by its ribbed, matte appearance. Because it has a high surface friction, it is one of the easiest fabrics to work with when practicing how to tie a bow for a dress.
- Behavior: The ridges lock against each other within the central knot, meaning once you pull the loops to your desired tension, they are highly unlikely to slip or sag.
- Best For: Structured cotton shift dresses, utility shirt dresses, and children’s formal holiday gowns.
Satin and Silk Sashes
Satin and silk are slippery, high-luster fabrics that present a dual challenge: they tend to slip out of tight knots, and they often feature a “right” shiny side and a “wrong” matte side.
- Behavior: Without proper directional twisting, the dull underside of the fabric can end up exposed on one of your loops, ruining the uniformity of the bow.
- Best For: Bridal gowns, bridesmaid dresses, silk slip accents, and evening formal wear.
Chiffon and Organza
These lightweight, sheer textiles offer immense volume without heavy physical weight.
- Behavior: Chiffon is fluid and floppy, requiring wider loops to stay visible, while organza is stiff and crisp, meaning it will hold a dramatic, cloud-like shape but can look overly bulky if the tails are left too long.
- Best For: Spring sundresses, tiered maxi dresses, and garden party attire.
2. Step-by-Step: How to Tie a Bow for a Dress (The Symmetrical Flat Method)
This is the gold standard technique for tying a sash at the back of a flower girl dress, the front of a wrap dress, or the side of a cocktail gown. This method guarantees that the central knot lies completely flat against the body, the loops sit perfectly horizontal, and both tails display their polished exterior side facing forward.
Step 1: Align your sash pieces. Pull the sash around the waist of your dress, ensuring the fabric lies completely smooth and flat against your back or stomach. Make the right tail approximately two inches longer than the left tail to compensate for the fabric consumed by the initial loop wrap.
Step 2: Cross the longer right strand (Side A) over the shorter left strand (Side B), creating an "X" shape flat against your waist.
Step 3: Tuck Side A up, under, and through the intersection point. Pull both ends vertically—Side A pointing straight up toward your chin, and Side B hanging straight down toward your knees. Tighten this base knot until it snugly hugs the dress fabric comfortably.
Step 4: Take the bottom strand (Side B) and form a neat, horizontal loop pointing to the right. This loop should be completely smooth, with no twists inside the channel of the fabric.
Step 5: Bring the top strand (Side A) straight down over the front of the loop you just made. The strand should cover the center of the loop like a vertical tie.
Step 6: Wrap Side A around the back of the horizontal loop. As you do this, you will notice a small gap or "tunnel" forms directly underneath the initial base knot.
Step 7: Fold Side A into a second loop and push it backward through that tunnel from the front to the back.
Step 8: Grab the inner folds of both loops simultaneously. Gently pull them outward away from each other horizontally while keeping your thumbs pressed against the center knot to lock it in place.
By pulling the loops horizontally rather than pulling the tails downward, the central knot compresses into a neat square. This locks the friction of the fabric and keeps the bow from rotating or dropping into a vertical line.
3. The Structural Half-Bow: A Modern Editorial Alternative
The full, symmetrical bow can sometimes feel too traditional or sweet for sleek, contemporary dresses. If you are styling a tailored linen shirt dress, an avant-garde midi dress, or a professional wrap dress, the asymmetrical half-bow offers a sophisticated, relaxed alternative.
The secret to a stunning half-bow is ensuring that the single loop retains structural crispness while the lone tail drapes fluidly down the side of the leg.
Step 1: Cross your left sash over your right sash, keeping the left strand significantly longer than the right.
Step 2: Pass the long left strand under the right strand and pull it upward to create a secure anchor knot at your side waist.
Step 3: Take the shorter, bottom strand and fold it into a clean loop that points directly outward toward your hip bone.
Step 4: Bring the long upper strand down over the front of that loop, wrapping it completely around the base of the loop from the front to the back.
Step 5: Instead of folding this long strand into a second loop, pull it entirely through the central loop tunnel, allowing it to hang down as a completely flat, un-looped vertical tail.
Step 6: Tighten the single loop and the single tail against each other until the central knot is firm and compact.
This structural configuration creates an eye-catching asymmetry that visually cinches the waistline while preventing the excess fabric bulk that can sometimes occur when trying to force two large loops onto a tight, tailored garment.
4. Tailoring the Bow to Your Dress Silhouette and Location
Where and how you position your bow dictates the optical lines of your outfit. A bow can act as a faux belt, a focal point on an open back, or a softening agent on a structural shoulder line.
| Dress Style | Bow Placement | Optimal Bow Type | Styling Objective |
| A-Line Ball Gown | Exact Center Back | Oversized Symmetrical Bow | Creates a dramatic, classic focal point above a full skirt. |
| Wrap or Shirt Dress | Off-Center Left/Right Hip | Minimalist Half-Bow | Defines the waistline without disrupting clean vertical dress lines. |
| Halter / High Neck Dress | Nape of the Neck | Long-Tailed Ribbon Bow | Elongates the neck column while letting tails mimic a back scarf. |
| One-Shoulder Gown | Top of the Shoulder | Floppy Cascade Bow | Softens an asymmetrical neckline and draws focus up to the face. |
Tying the Perfect Back Sash on Formal Gowns
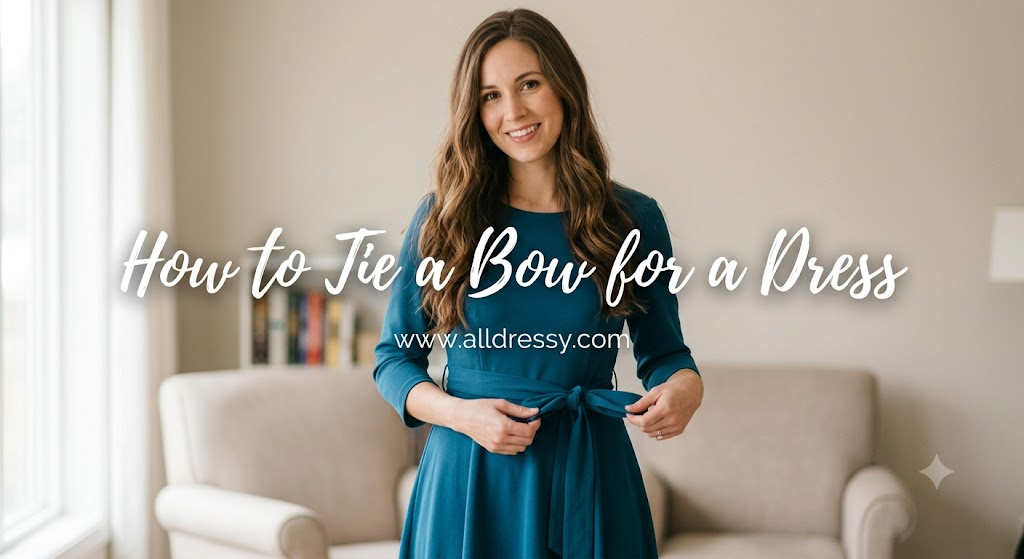
When figuring out how to tie a bow for a dress that features a dramatic rear sash, it is almost impossible to get perfect tension if you are tying it on yourself blindly behind your back. If you do not have an assistant, tie the bow around your front waist first, utilizing a mirror to guarantee pristine symmetry and crisp edge alignment.
Once the bow is fully formed and locked into place, gently hold the base of the knot with one hand, suck in your stomach, and slide the entire sash smoothly around your waist until the bow resides exactly over your spine. Ensure you smooth down any fabric bunching along the side loops of the dress after the rotation is complete.
Shoulder and Neckline Accentuation
When working with shoulder ties on summer sundresses or evening column gowns, avoid heavy knots that sit uncomfortably on the collarbone. For these placements, use a lightweight silk or organza ribbon.
When tying a shoulder bow, ensure the loops do not extend past the natural point of your shoulder joint, as this can create the optical illusion of drooping shoulders. Instead, keep the loops compact and let the tails hang down long and uninhibited across the upper arm or down the bodice of the dress.
5. Advanced Techniques for Double-Sided and Slippery Fabrics
If you are dealing with premium double-faced satin, heavy velvet, or brocade ribbons, standard knotting can cause the underside of the fabric to twist outward awkwardly. To conquer this issue, you must introduce a deliberate twist mechanism into your finger loops.
The Reverse-Twist Trick for Double-Faced Fabric
When executing Step 5 of the symmetrical bow method, as you bring the top strand down over the front of your first loop, use your thumb and index finger to give the fabric a sharp, 180-degree twist directly behind the center of the knot. This ensures that when you push the second loop through the back tunnel, the polished, vibrant face of the fabric is forced to turn outward, keeping both loops completely uniform in color, texture, and luster.
Managing Extra Long Sashes
If your dress comes with an exceptionally long fabric sash that wraps around your waist multiple times, do not attempt to tie a giant bow with massive loops; the excess fabric weight will cause the knot to collapse within minutes of walking.
Instead, wrap the sash around your waist twice, pulling it tight to create a wide, cummerbund-style midsection belt. Cross the strands flat against your side, secure them with a subtle flat square knot, and let the long, elegant tails hang down to the hem of your dress without loops. This creates a streamlined, modern silhouette that elongates your legs.
6. Maintaining the Bow Shape Throughout the Day
Once you have mastered how to tie a bow for a dress, the final challenge is keeping that bow immaculate through hours of sitting, dancing, or traveling.
The Hidden Safety Pin Anchor
To prevent a heavy fabric sash from sliding down over your hips or riding up beneath your bust line, utilize a small, hidden safety pin. Once your bow is perfectly tied and centered, insert a safety pin from the inside of the dress bodice, pushing it through the back layer of the dress fabric and directly into the underside of the bow’s central knot. This locks the bow to the dress structure, preventing it from drooping or shifting out of its designated position.
Fabric Stiffening for Special Events
If you are working with soft cotton ribbons or fine silk that tends to collapse into a sad, deflated string, you can pre-treat the sash before tying. Lightly spray the ribbon section with an artisan fabric sizing spray or starch while ironing it on a low heat setting. This injects temporary structural integrity into the textile fibers, giving your loops a crisp, perky, camera-ready bounce that holds its form flawlessly throughout your event.
Frequently Asked Questions
Why does my dress bow always look lopsided or vertical?
This happens because of the direction of your second loop. If you treat your dress sash like a pair of shoelaces and pull the loops vertically (up and down), the bow will sag and sit sideways. To fix this, always bring your top strand straight down over the front of the first loop, push it through the back tunnel, and pull the finished loops horizontally (left and right) away from each other to lock a square knot into place.
How do I stop a silk or satin bow from coming undone?
Slippery fabrics like silk and satin lack natural surface friction, causing knots to slide open with movement. To secure them, tie a firm, flat knot as your base before creating your first loop. When pulling the final loops to tighten the bow, apply firm, even pressure to compress the center knot completely. For high-stakes events, you can tuck a tiny safety pin horizontally through the back of the central knot or apply a small drop of fabric-safe fashion tape inside the knot to keep it from slipping.
What should I do if one sash tail is much longer than the other?
If your tails end up uneven, it is usually because you didn’t compensate for the fabric consumed during the knotting process. When you initially drape the sash around your waist, make the strand you plan to loop first about two to three inches longer than the other side. If the finished bow is still uneven, you can adjust it by gently pulling on the tail of the shorter side while holding the central knot, or feed the excess length back into the opposite loop.
Can I iron a dress sash while the bow is still tied?
No, you should never iron a sash while it is tied. Pressing a tied bow will flatten the structural volume of the loops and create permanent, sharp creases in the central knot that are incredibly difficult to remove. Always untie the bow, lay the sash completely flat on an ironing board, and press it according to the fabric’s heat requirements before re-tying it.
How big should the loops of the bow be compared to the dress?
As a general styling rule, the width of your finished bow loops should not extend past the natural width of your waistline or torso. If the loops stick out past your silhouette, they create an unflattering, overly wide illusion. Aim for compact, perky loops that sit well within the boundaries of your frame, and let the trailing tails provide the drama and movement.
Conclusion
Mastering how to tie a bow for a dress is an effortless way to elevate a garment from standard off-the-rack attire to a polished, couture-level look. By shifting away from random knotting and embracing directional wrapping, tension control, and fabric theory, you can guarantee that your sashes and ribbons sit with perfect symmetry. Whether you choose a classic, horizontal flat bow for a formal evening gown or a contemporary, structural half-bow for a sleek day dress, these styling techniques ensure your outfit remains secure, balanced, and immaculately tailored from the moment you step out the door.