
Adding legs is one of the easiest ways to transform an ordinary or outdated dresser into a more stylish, elevated piece of furniture. If you are wondering how to add legs to a dresser, the process usually involves choosing suitable legs, checking the dresser’s bottom construction, creating a secure mounting surface, measuring carefully, pre-drilling holes, and attaching the legs or mounting plates. This simple furniture makeover can change the overall appearance of a dresser while also adding useful height and making the floor underneath easier to clean.
Whether you are updating an old wooden dresser, refreshing a secondhand piece, or simply want a more modern furniture design, learning how to add legs to a dresser can give you plenty of creative options. Depending on the construction of the dresser, you can use straight wooden legs, tapered legs, bun feet, angled legs, or metal hairpin-style legs. However, the most important consideration is not just appearance—it is whether the bottom of the dresser can safely support the new legs.
This guide explains the process in detail, including preparation, measurements, leg selection, mounting methods, common mistakes, finishing ideas, and ways to make the finished dresser look professionally designed.
Why Add Legs to a Dresser?
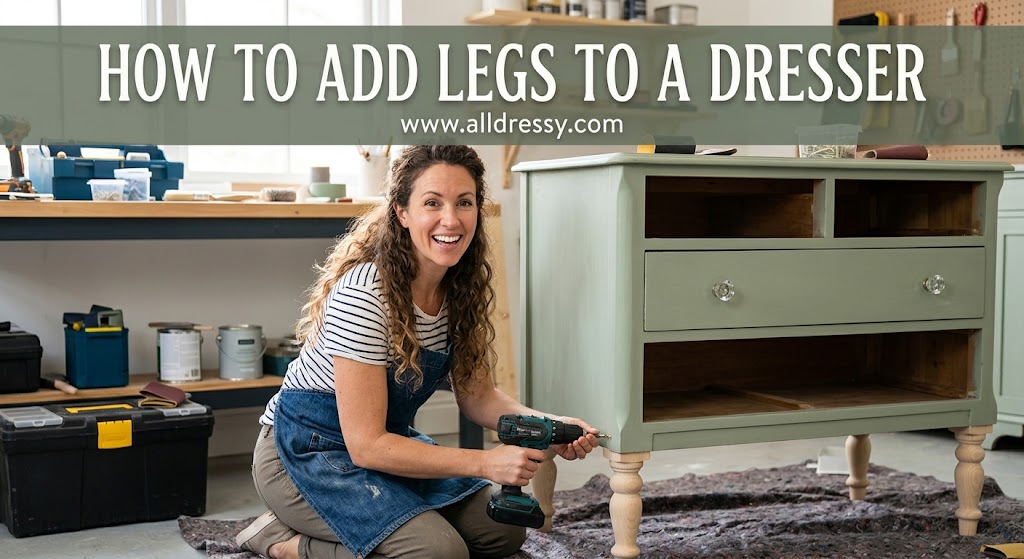
Before learning how to add legs to a dresser, it helps to understand why this modification can make such a noticeable difference.
A dresser without visible legs can sometimes look heavy or visually low to the ground. Adding legs creates open space underneath and gives the furniture a lighter appearance. It can also increase the overall height of the dresser, depending on the size of the legs.
Adding legs can also make an older dresser look more contemporary. For example, tapered wooden legs can create a mid-century-inspired appearance, while simple straight legs can provide a clean modern look. Metal legs can produce an industrial style.
Another advantage is easier access underneath the furniture. A raised dresser provides more clearance between the bottom and the floor, making it easier to clean dust and debris underneath.
Most importantly, adding legs can be a useful furniture-upcycling project. Instead of replacing an otherwise functional dresser, you can change its appearance and give it a completely different character.
How to Add Legs to a Dresser: What You Need
The exact materials depend on the type of dresser and leg system you choose, but most projects require relatively simple supplies.
Basic Materials
You may need:
- Four compatible furniture legs
- Mounting plates or brackets, if required
- Appropriate screws
- Pilot-hole drill bit
- Measuring tape
- Pencil
- Drill or screwdriver
- Level
- Sandpaper
- Wood filler, if necessary
- Scrap wood for reinforcement, if necessary
- Protective floor covering
Some legs come with their own mounting hardware, while others require separate mounting plates. Always check that the hardware is compatible with the leg design and the dresser’s construction.
A useful principle is to avoid choosing hardware based only on appearance. The connection between the leg and dresser needs to be strong enough for the furniture’s weight and intended use.
Choose the Right Legs for Your Dresser
One of the most important parts of learning how to add legs to a dresser is selecting the appropriate leg style.
Tapered Wooden Legs
Tapered legs are popular for modern and mid-century-inspired furniture. They become narrower toward the bottom and can make a large dresser appear visually lighter.
They work particularly well on wooden dressers with simple, clean lines.
Straight Wooden Legs
Straight legs offer a simple and versatile appearance. They are suitable for many furniture styles and can be painted or stained to match the dresser.
Bun Feet
Bun feet are short, rounded furniture feet that provide a more traditional or decorative appearance. They are useful when you want to raise the dresser only slightly.
Angled Legs
Angled legs can give a dresser a distinctive retro or mid-century appearance. Because their angle changes how the dresser’s weight is distributed, make sure the mounting hardware is designed for angled installation.
Metal Legs
Metal legs can create a contemporary or industrial appearance. Hairpin-style legs, for example, have a distinctive open design and can make a heavy dresser look more lightweight.
The leg style should complement the dresser rather than overwhelm it. Consider the dresser’s width, depth, existing hardware, drawer design, and overall proportions before making your choice.
Check the Dresser Before Adding Legs
Do not immediately start drilling holes. First, inspect the underside of the dresser.
Turn the dresser over carefully and examine how the bottom is constructed. Look for:
- Existing legs
- A solid wooden base
- A recessed bottom
- Thin plywood or fiberboard
- Interior support rails
- Corner blocks
- Screwed or glued components
- A toe-kick or existing platform
This inspection matters because furniture legs need to be attached to a structurally sound area.
A thin bottom panel by itself may not provide enough material for a secure connection. In some cases, reinforcement blocks or a new support frame may be necessary.
Furniture DIY guides commonly emphasize checking the structure before attaching mounting plates because the screws need solid material to grip securely.
Remove Existing Legs or the Old Base
If the dresser already has legs or a bottom platform, determine whether they should remain.
Some dressers have a separate base attached with screws. If so, carefully remove the screws and detach the base.
If a component is glued or nailed, removal can require more care. Avoid forcing parts apart in a way that could damage the dresser frame.
Once the old base is removed, inspect the exposed bottom again. You may discover that the dresser already has suitable solid areas where the new legs can be installed.
If the existing bottom is uneven, damaged, or too thin, repair or reinforce it before continuing.
How to Add Legs to a Dresser Step by Step
Once you have selected the legs and inspected the dresser, you can begin the installation.
Step 1: Prepare a Safe Workspace
Work on a stable, flat surface. Place a blanket, cardboard, or protective material underneath the dresser to prevent scratches.
Because a dresser can be heavy and awkward to move, get help from an adult when turning or repositioning it. Keep drawers secured so they cannot slide out unexpectedly.
Remove loose objects from the dresser before turning it over.
Step 2: Measure the Dresser
Measure the width and depth of the dresser.
Then determine where each leg should be positioned.
Do not simply guess based on the corners. Consider the location of the internal frame and structural supports.
The legs should be positioned symmetrically so that the dresser’s weight is distributed evenly.
A simple method is to measure the same distance from each side and front or back edge.
For example, if you decide that each mounting plate should sit a consistent distance inward from the edge, repeat that measurement at all four corners.
Consistency is more important than choosing one universal measurement because dressers differ in size and construction.
Step 3: Check the Mounting Area
Place each mounting plate or leg temporarily where you intend to install it.
Look underneath the dresser and verify that the screws will enter solid material.
This is particularly important for dressers made from composite materials or those with hollow sections.
If the mounting location does not have enough solid material, consider adding a suitable wood reinforcement block or constructing a stronger base.
A documented dresser-leg project similarly recommends adding reinforcement when the existing base does not provide an adequate attachment point.
Step 4: Mark the Holes
Place the mounting plate in position and mark the screw holes with a pencil.
Repeat the process on all four corners.
Before drilling, measure everything again.
This is a good time to check:
- Are all four legs positioned equally?
- Are the plates facing the correct direction?
- Will the screws enter solid material?
- Is there enough clearance from the dresser edges?
- Could a screw interfere with a drawer or internal component?
Taking an extra few minutes at this stage can prevent major problems later.
Step 5: Drill Pilot Holes
Use an appropriately sized drill bit to make pilot holes.
The pilot holes should be suitable for the screws being used and should not penetrate unnecessarily deep into the dresser.
A pilot hole helps guide the screw and can reduce the risk of damaging the wood.
Be especially careful with thin panels. Drilling too deeply can damage the surface or potentially interfere with components on the other side.
Step 6: Attach the Mounting Plates
Position the mounting plate over the pilot holes.
Install the screws and tighten them securely.
Do not overtighten them. Excessive force can damage wood or strip the screw hole, especially in softer materials.
After installing each plate, gently check whether it moves. A properly installed plate should sit firmly against the dresser.
Step 7: Attach the Furniture Legs
Depending on the design, the legs may screw directly into the mounting plates or attach using another supplied mechanism.
Follow the hardware design carefully.
Thread the leg into place and tighten it enough to make the connection secure without damaging the hardware.
Repeat the process for the remaining legs.
Some furniture-leg systems use mounting plates specifically designed to make leg installation easier. This is a common approach in dresser makeover projects.
Step 8: Check the Height and Stability
Carefully return the dresser to an upright position.
Do not immediately load it with clothing or other heavy items.
First, check whether it sits evenly.
Place a level across the top if available. Check the dresser from several directions.
If one corner is higher or lower, inspect the leg connection and adjust the leg if the hardware allows adjustment.
Do not try to compensate for a major structural problem simply by forcing one leg into position.
Step 9: Test the Drawers
Open and close every drawer.
Make sure the new legs have not changed the dresser’s alignment or caused any part of the frame to shift.
Check that:
- Drawers open smoothly
- Drawers close completely
- Nothing rubs against the new legs
- The dresser does not rock
- The legs remain firmly attached
Testing the drawers is especially important if the legs or new base extend inward or outward from the original footprint.
How to Add Legs to a Dresser When the Bottom Is Too Thin
Sometimes the biggest challenge is not the legs themselves but the dresser’s bottom construction.
If the bottom does not provide enough solid material for screws, you may need to reinforce it.
One option is adding appropriately sized wood blocks beneath the structural corners. These blocks create thicker attachment points for the mounting hardware.
Another approach is building a new wooden base frame that attaches securely to the dresser and provides a strong surface for the legs.
A reinforced base can also be useful if you want to install larger legs or if the dresser is particularly wide and heavy.
The key principle is simple: the legs should connect to the dresser’s structural frame, not merely to a thin decorative panel.
How to Add Legs to a Dresser Without Mounting Plates
Not every leg design requires a traditional mounting plate.
Some furniture legs use hanger bolts or threaded inserts. With these systems, a threaded component is installed into the dresser and the leg is screwed into it.
Other designs use a custom wooden base.
A dresser rehabilitation project, for example, used hanger bolts to attach feet to the bottom of a dresser.
The correct method depends on the specific leg hardware. Never assume that a screw designed for one type of furniture leg will work for another.
How to Add Legs to a Dresser for Extra Height
If your primary goal is increasing the dresser’s height, measure the final height before purchasing legs.
Remember that the leg’s advertised length may not always equal the exact amount of height added, especially if the mounting system has additional components.
Calculate:
Final dresser height = original dresser height + effective leg height
Also consider the surrounding furniture. A dresser that becomes substantially taller may look disproportionate beside a low bed or nightstand.
The goal is not simply to make the dresser taller. The goal is to create balanced proportions.
How to Add Legs to a Dresser for a Modern Look
For a modern makeover, choose simple legs with clean shapes.
Good style combinations can include:
- Minimalist dresser + tapered legs
- Plain wooden dresser + natural wood legs
- Painted dresser + contrasting metal legs
- Wide dresser + short geometric legs
- Mid-century-inspired dresser + angled wooden legs
You can also refinish the legs so they coordinate with the dresser.
For example, natural wooden legs can complement a stained dresser, while painted legs can blend into a painted frame.
Painting and Finishing the Dresser
If you are refinishing the dresser at the same time, it is usually easier to finish the furniture before permanently installing the legs.
Remove the legs if they are already attached and prepare each surface separately.
Clean the dresser thoroughly, repair imperfections, sand where appropriate, and apply your chosen finish.
The legs can be stained, painted, or left natural depending on the desired style.
Painting furniture with the legs removed can make it easier to reach the lower areas and avoid accidentally covering hardware. (A Ray of Sunlight)
Allow finishes to cure according to the product instructions before placing the dresser back into regular use.
Common Mistakes When Adding Legs to a Dresser
Learning how to add legs to a dresser is relatively straightforward, but several mistakes can compromise the result.
Choosing Legs That Are Too Tall
Very tall legs can make a dresser unstable or visually disproportionate.
Choose a height appropriate for the dresser’s size and intended use.
Ignoring the Weight of the Dresser
A large dresser filled with clothing can be considerably heavier than an empty dresser.
The legs and mounting hardware must be appropriate for the furniture’s expected load.
Attaching Legs to Thin Material
This is one of the most important mistakes to avoid.
A screw installed only into a thin panel may not provide a reliable connection.
Whenever possible, attach legs to structural wood or reinforce the mounting area.
Skipping Measurements
Even small differences in leg placement can make the finished dresser look uneven.
Measure each corner instead of estimating.
Forgetting Drawer Clearance
A leg or reinforcement block can interfere with a drawer if it is positioned incorrectly.
Check the interior and exterior before drilling.
Using Screws That Are Too Long
A screw that is too long can penetrate through the dresser’s material and cause damage.
Choose hardware appropriate for the thickness of the mounting surface.
Overtightening Screws
More tightening does not always mean more strength.
Overtightening can strip the wood or damage the hardware.
How to Make Dresser Legs Look Professionally Installed
Small details can make a major difference.
First, make sure the legs are perfectly symmetrical.
Second, keep the mounting hardware aligned.
Third, ensure the finish on the legs complements the dresser.
Finally, inspect the dresser from every angle after installation.
A professional-looking result depends as much on accurate measuring and careful finishing as it does on the quality of the legs themselves.
Can You Add Legs to an IKEA or Flat-Pack Dresser?
Yes, but the construction needs to be evaluated first.
Many flat-pack dressers use particleboard, MDF, or other engineered materials. These materials can require a different approach from solid wood.
Do not assume that any screw can safely support a leg.
Look for structural areas such as thicker panels, reinforced corners, or an existing base frame. If necessary, build a stronger support structure that distributes the load.
Some IKEA dresser makeovers involve constructing custom leg assemblies rather than simply attaching standard legs directly to the existing bottom.
How to Add Legs to a Dresser With a Recessed Bottom
A recessed bottom can make direct leg installation difficult.
In this situation, you may need to create a small support frame or add solid blocks where the legs will be attached.
Measure the recess carefully before choosing the leg height.
The support should be attached to the dresser’s structural portions rather than relying solely on a thin bottom panel.
This method may require more woodworking than a basic mounting-plate installation, but it can produce a stronger and cleaner result.
How to Add Hairpin Legs to a Dresser
Hairpin legs are a popular option for a modern or industrial-style makeover.
Start by checking whether the dresser has enough flat surface underneath for the hairpin-leg mounting plates.
Position the legs symmetrically and mark all mounting holes.
Pre-drill the holes and attach the legs with suitable screws.
If the dresser’s bottom is too narrow or weak, create a stronger mounting surface first.
Hairpin-leg projects often require modifications to the original dresser base when the available mounting area is too small.
How to Add Legs to a Dresser and Keep It Stable
Stability should always be more important than appearance.
Four legs should make firm contact with the floor. If the dresser rocks, identify the reason before using it.
Possible causes include:
- Uneven legs
- Uneven floor
- Incorrect mounting
- Loose hardware
- Weak dresser construction
- Poorly positioned legs
If the furniture remains unstable after tightening the hardware, stop using it until the structural issue is corrected.
Floor-protection pads can also help protect flooring and compensate for very small differences in contact height, but they should not be used to hide a significant structural problem.
Maintenance After Adding Dresser Legs
Once the project is complete, occasionally inspect the legs and mounting hardware.
Check for:
- Loose screws
- Cracks
- Movement
- Uneven positioning
- Damaged mounting plates
- Changes in stability
This is particularly important during the first few weeks after installation because the materials may settle slightly.
Avoid dragging the dresser across the floor. Lift it carefully with appropriate help when it needs to be moved.
Final Tips for a Successful Dresser Leg Makeover
If you want the best results when learning how to add legs to a dresser, keep these principles in mind:
- Choose legs that match the dresser’s size and style.
- Inspect the bottom construction before drilling.
- Attach legs to strong structural material.
- Reinforce weak mounting areas when necessary.
- Measure every leg position carefully.
- Use appropriately sized hardware.
- Drill pilot holes before installing screws when appropriate.
- Avoid overtightening.
- Check drawer clearance before final installation.
- Test stability before loading the dresser.
- Finish and paint components carefully.
- Recheck the hardware periodically.
Adding legs can completely change the personality of a dresser without requiring you to replace the entire piece. With careful planning, accurate measurements, suitable hardware, and attention to structural support, an ordinary dresser can become a customized piece that looks taller, lighter, and more intentional.
The most important lesson in how to add legs to a dresser is that successful installation starts underneath the furniture. Beautiful legs will not improve a dresser if they are attached to a weak surface. Take time to understand the construction, reinforce it where necessary, position the legs evenly, and test the finished piece before putting it into everyday use.
Frequently Asked Questions About How to Add Legs to a Dresser
1. Can I add legs to any dresser?
In many cases, yes, but the dresser must have a suitable structural area for attaching the legs. Before starting, inspect the underside to determine whether it is made from solid wood, plywood, MDF, particleboard, or another material. If the bottom is thin or weak, reinforcement may be necessary before installing the legs.
2. What type of legs are best for a dresser?
The best legs depend on the dresser’s design and weight. Tapered wooden legs work well for modern and mid-century styles, while straight legs offer a simple appearance. Bun feet are suitable for traditional furniture, and metal legs can create a contemporary or industrial look. Always choose legs and hardware capable of supporting the dresser’s expected weight.
3. How tall should dresser legs be?
There is no single ideal height. Short legs provide a subtle lift, while taller legs create a more dramatic change in appearance and overall furniture height. Consider the dresser’s existing height, width, proportions, and surrounding furniture before choosing the leg length.
4. Do I need mounting plates to add legs to a dresser?
Not always. Some furniture legs attach with mounting plates, while others use threaded inserts, hanger bolts, brackets, or custom wooden supports. Use the installation method recommended for the particular legs you purchase and make sure the attachment system is suitable for the dresser’s construction.
5. Can I add legs to a dresser with a thin bottom?
Yes, but you may need to reinforce the bottom first. Attaching legs directly to a thin panel may not provide enough support. Adding appropriately positioned wood blocks or constructing a stronger base can create a more secure mounting surface.
6. Should I remove the dresser drawers before adding legs?
Removing the drawers is generally a good idea while working on the dresser. It makes the furniture lighter and reduces the chance of drawers sliding out when the dresser is moved or turned over. Store the drawers safely until the installation is finished.
7. How do I prevent my dresser from wobbling after adding legs?
Measure carefully, install the legs symmetrically, tighten the hardware appropriately, and check the dresser with a level. All four legs should make stable contact with the floor. If the dresser still rocks, inspect the leg connections and the floor rather than simply forcing one leg into position.
8. Can I paint the dresser legs?
Yes. Wooden legs can generally be painted or stained to coordinate with the dresser. For the cleanest result, prepare and finish the legs properly before final installation. Metal legs may require a finish specifically designed for metal surfaces.
9. Can I add legs to a flat-pack or IKEA dresser?
It is possible, but extra care may be necessary. Many flat-pack dressers use engineered wood rather than solid wood, so the attachment points need to be checked carefully. Reinforcing the corners or building a supporting base may provide a more secure connection than simply screwing legs into a thin panel.
10. Is adding legs to a dresser a good DIY furniture project?
Yes, it can be a relatively simple furniture makeover when the dresser has a suitable structure and you use compatible hardware. Accurate measurements, proper reinforcement, careful drilling, and stability testing are essential. If the dresser is unusually heavy or structurally damaged, professional assistance may be appropriate.
Conclusion
Learning how to add legs to a dresser is a practical way to update the appearance and functionality of an existing piece of furniture. Whether you want a modern makeover, a mid-century-inspired design, a traditional appearance, or simply more clearance underneath the dresser, the right legs can make a significant difference.
The most important part of the project is choosing a secure attachment method. Before drilling, inspect the dresser’s underside and identify strong structural areas. If the existing material is too thin, reinforce it rather than relying on a weak panel. Measure each leg position carefully, use suitable hardware, drill pilot holes when appropriate, and make sure the finished dresser sits level and stable.
You can also customize the final appearance by selecting different leg shapes, materials, heights, and finishes. Wooden legs can provide warmth and character, while metal legs can create a sleek contemporary appearance. With thoughtful planning and careful installation, adding legs can turn an ordinary dresser into a refreshed, personalized piece of furniture.
Ultimately, a successful dresser makeover is about combining style, proportion, and structural stability. Take your time with measurements and installation, and you can achieve a polished result that makes the dresser look intentionally designed rather than simply modified.