
Learning how to draw a dress step by step is one of the most valuable skills for aspiring fashion designers, illustrators, artists, and creative hobbyists. Whether you want to create elegant evening gowns, casual summer dresses, wedding dresses, or fantasy costumes, understanding the fundamentals of dress drawing helps bring your fashion ideas to life.
Many beginners think drawing dresses is difficult because of the folds, fabric movement, and body proportions involved. However, once you understand the process and follow a structured method, drawing beautiful dresses becomes much easier. This guide explains how to draw a dress step by step using simple techniques that anyone can learn.
By mastering basic dress shapes, fabric flow, folds, shadows, and decorative details, you can gradually develop professional-looking fashion sketches that stand out.
Why Learning How to Draw a Dress Step by Step Is Important
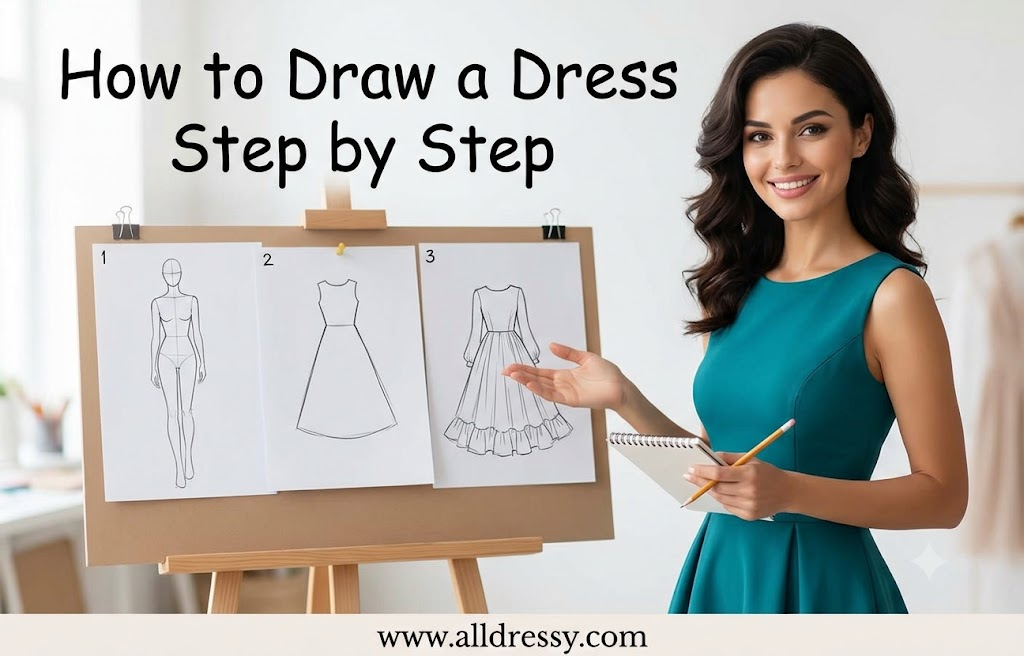
Drawing dresses helps improve several artistic skills at once:
- Understanding body proportions
- Learning fabric movement
- Practicing sketching techniques
- Developing creativity
- Building fashion illustration skills
- Improving observation abilities
- Creating original clothing designs
Fashion designers use dress sketches to communicate ideas before garments are produced. Artists use dress drawings for character design, storytelling, and fashion illustration projects.
Materials Needed Before You Start
Before practicing how to draw a dress step by step, gather a few basic supplies.
Pencil
A standard HB pencil works well for initial sketches.
Eraser
A soft eraser helps remove construction lines without damaging the paper.
Sketchbook
Use smooth drawing paper for cleaner lines.
Ruler
Helpful for maintaining symmetry.
Colored Pencils or Markers
Useful for adding color and bringing your dress illustrations to life.
Fine-Line Pen
Perfect for outlining the final design.
Understanding Dress Structure Before Drawing
Before drawing a dress, it helps to understand its main parts.
Most dresses include:
- Neckline
- Bodice
- Waistline
- Skirt
- Sleeves (optional)
- Hemline
- Decorative elements
Breaking a dress into simple sections makes the drawing process easier.
How to Draw a Dress Step by Step for Beginners
Step 1: Draw the Fashion Figure
Start with a simple fashion figure or mannequin.
Draw:
- Head
- Neck
- Shoulders
- Torso
- Waist
- Hips
- Legs
Do not focus on details yet. The purpose is simply to create a foundation for the dress.
Step 2: Sketch the Bodice
The bodice covers the upper body.
Lightly draw the shape around:
- Chest
- Ribcage
- Waist
Different bodice styles include:
- Fitted
- Corset
- Empire waist
- Straight cut
Keep your lines loose and adjustable.
Step 3: Draw the Waistline
The waistline connects the top of the dress to the skirt.
Popular waistline styles include:
- Natural waist
- High waist
- Empire waist
- Dropped waist
Mark the waist clearly because it influences the entire silhouette.
Step 4: Create the Skirt Shape
Now sketch the skirt.
Begin with a simple outline.
Possible skirt styles include:
- A-line
- Ball gown
- Pencil
- Mermaid
- Pleated
- Circle skirt
Use long flowing lines to establish movement.
Step 5: Add the Neckline
The neckline determines much of the dress’s personality.
Popular necklines include:
- V-neck
- Scoop neck
- Sweetheart
- Boat neck
- Halter
- Off-the-shoulder
Draw the neckline carefully since it becomes a focal point.
Step 6: Add Sleeves
Sleeves are optional.
Common sleeve styles include:
- Sleeveless
- Cap sleeves
- Short sleeves
- Long sleeves
- Puff sleeves
- Bell sleeves
Sketch them lightly before refining.
Step 7: Define the Hemline
The hemline is the bottom edge of the dress.
Options include:
- Mini
- Knee-length
- Midi
- Maxi
- High-low
- Asymmetrical
The hemline helps establish the dress style.
Step 8: Add Fabric Folds
Fabric folds make the dress appear realistic.
Observe where gravity naturally affects clothing.
Common fold locations:
- Waist
- Elbows
- Hips
- Knees
- Underarms
Use gentle curved lines rather than harsh straight lines.
Step 9: Refine the Outline
Erase unnecessary construction lines.
Darken the final outline.
Clean edges improve the professional appearance of the sketch.
Step 10: Add Shading
Shading creates depth and realism.
Focus on:
- Under folds
- Beneath sleeves
- Waist areas
- Layer overlaps
Build shading gradually.
How to Draw an A-Line Dress Step by Step
An A-line dress is one of the easiest styles for beginners.
Sketch the Bodice
Draw a fitted upper section.
Create the A Shape
Expand outward from the waist toward the hem.
Add Gentle Folds
Use subtle lines to show fabric movement.
Finish with Details
Add seams, buttons, or decorative trim.
The simplicity of an A-line silhouette makes it ideal for practice.
How to Draw a Princess Dress Step by Step
Princess dresses feature dramatic volume.
Draw a Small Waist
Keep the waist narrow.
Expand the Skirt
Create a large bell-shaped skirt.
Add Layers
Layered fabric creates elegance.
Include Decorative Features
Consider:
- Lace
- Ruffles
- Embroidery
- Jewels
These details help create a royal appearance.
How to Draw a Wedding Dress Step by Step
Wedding dresses require attention to elegance and fabric flow.
Draw the Bodice
Use fitted lines.
Add a Full Skirt
Extend outward with smooth curves.
Sketch a Train
Add a flowing extension behind the dress.
Draw Veil Details
A veil enhances the bridal look.
Include Lace Patterns
Light decorative patterns create sophistication.
How to Draw a Ball Gown Step by Step
Ball gowns feature dramatic volume.
Draw a Structured Bodice
Keep the upper section fitted.
Create a Large Skirt
Use wide sweeping lines.
Add Layers
Layered skirts increase realism.
Shade Carefully
Large gowns benefit from extensive shading and fold work.
How to Draw a Mermaid Dress Step by Step
Mermaid dresses hug the body before flaring outward.
Draw a Fitted Shape
Follow the body’s curves closely.
Flare at the Knees
Expand dramatically below the knees.
Add Fabric Movement
Use flowing lines around the flare section.
Refine the Silhouette
The dramatic shape is the defining characteristic.
Understanding Fabric Behavior
A major part of learning how to draw a dress step by step is understanding fabric.
Different materials behave differently.
Silk
- Smooth
- Soft folds
- Elegant draping
Satin
- Reflective
- Luxurious appearance
- Sharp highlights
Cotton
- Moderate folds
- Structured shape
Tulle
- Lightweight
- Airy appearance
Velvet
- Rich texture
- Deep shadows
Studying fabric helps create realistic dress illustrations.
How to Draw Dress Folds Step by Step
Many beginners struggle with folds.
Identify Tension Points
Folds usually originate from:
- Waistbands
- Seams
- Elbows
- Shoulders
Use Flowing Lines
Avoid random wrinkles.
Follow Gravity
Fabric naturally hangs downward.
Vary Fold Size
Combining large and small folds creates realism.
How to Draw Fashion Sketch Dresses
Fashion sketches often use elongated figures.
Draw Taller Proportions
Fashion figures are usually longer than realistic human proportions.
Keep Lines Elegant
Use confident strokes.
Focus on Clothing
The dress should remain the center of attention.
Simplify Facial Features
Fashion illustrations prioritize garment design.
Common Mistakes When Learning How to Draw a Dress Step by Step
Ignoring Body Structure
Always begin with a mannequin or fashion figure.
Drawing Random Folds
Folds must follow fabric tension.
Overworking Details
Focus on major shapes first.
Uneven Symmetry
Check both sides frequently.
Using Dark Lines Too Early
Sketch lightly until the design is finalized.
Tips to Improve Dress Drawing Skills Faster
Practice Daily
Even fifteen minutes helps.
Study Real Dresses
Observe clothing in stores, magazines, and photos.
Use References
Reference images improve accuracy.
Experiment With Styles
Try:
- Casual dresses
- Formal gowns
- Vintage designs
- Fantasy dresses
Keep a Sketchbook
Regular sketching accelerates improvement.
How to Add Fashion Design Details
Once basic dress shapes are mastered, add advanced details.
Buttons
Use evenly spaced circles.
Zippers
Draw straight central lines.
Lace
Use delicate repeated patterns.
Beading
Small dots can represent beads.
Embroidery
Create decorative motifs.
Ruffles
Draw layered curved edges.
These elements enhance realism and uniqueness.
Coloring Dress Drawings
Color transforms a simple sketch into a finished fashion illustration.
Choose a Color Palette
Decide on:
- Monochromatic
- Pastel
- Bold fashion colors
- Neutral tones
Add Base Colors
Apply light layers first.
Build Shadows
Darken fold areas gradually.
Create Highlights
Leave bright sections untouched.
Blend Smoothly
Smooth transitions improve professional appearance.
Digital Techniques for Drawing Dresses
Many artists now create fashion illustrations digitally.
Popular software includes:
- Drawing apps
- Illustration software
- Digital painting programs
Benefits include:
- Easy corrections
- Unlimited color options
- Layer management
- Faster workflow
The same fundamental principles of how to draw a dress step by step apply whether drawing traditionally or digitally.
Practice Exercises for Beginners
Exercise 1: Draw Ten Dress Silhouettes
Focus only on shape.
Exercise 2: Draw Five Neckline Variations
Practice different neck styles.
Exercise 3: Create Sleeve Studies
Draw multiple sleeve types.
Exercise 4: Practice Fabric Folds
Study photographs and replicate folds.
Exercise 5: Design Original Dresses
Combine techniques to create unique garments.
These exercises strengthen core fashion illustration skills.
Advanced Techniques for Professional Dress Illustrations
Once comfortable with basic sketches, explore advanced methods.
Dynamic Poses
Move beyond standing figures.
Layered Garments
Create complex outfits.
Mixed Fabrics
Combine materials such as lace and satin.
Perspective Drawing
Show dresses from different angles.
Runway Illustration Style
Capture movement and elegance.
Professional fashion illustrators rely heavily on these techniques to create compelling artwork.
Developing Your Own Dress Design Style
As you continue practicing how to draw a dress step by step, you will naturally develop a personal style.
Some artists prefer:
- Minimalist sketches
- Realistic fashion drawings
- Fantasy costumes
- Anime-inspired dresses
- Haute couture designs
FAQs About How to Draw a Dress Step by Step
Is drawing a dress difficult for beginners?
No, drawing a dress is easier than many beginners expect. By starting with simple shapes and following a structured step-by-step process, anyone can learn to draw basic dresses. The key is to focus on the overall silhouette first and add details gradually.
What is the easiest dress style to draw?
An A-line dress is usually the easiest style for beginners. It has a simple fitted bodice and a skirt that widens toward the hem, making it straightforward to sketch and refine.
Do I need to draw a body before drawing a dress?
Yes, drawing a basic fashion figure or mannequin first helps maintain correct proportions and ensures the dress fits naturally on the body. Even professional fashion illustrators begin with a figure sketch before adding clothing.
How can I make my dress drawings look more realistic?
To create realistic dress drawings, pay attention to fabric folds, shading, highlights, and the way the material drapes around the body. Studying real dresses and practicing fabric textures will significantly improve realism.
Which pencil is best for drawing dresses?
An HB pencil is ideal for initial sketches because it creates light lines that are easy to erase. Many artists also use 2B pencils for darker outlines and shading.
How do I draw flowing fabric?
Flowing fabric should be drawn with smooth, curved lines that follow gravity. Observe how fabric hangs and gathers in real life, then use long, natural strokes to recreate that movement in your sketch.
What are the most important parts of a dress drawing?
The most important parts include the neckline, bodice, waistline, skirt shape, sleeves, hemline, and fabric folds. Getting these elements right creates a balanced and attractive dress design.
Can I draw dresses without fashion design experience?
Absolutely. Learning how to draw a dress step by step does not require fashion design training. Beginners can develop their skills through regular practice, observation, and patience.
How long does it take to become good at drawing dresses?
The learning curve varies for everyone. With consistent practice several times per week, most beginners notice significant improvement within a few months. Advanced fashion illustration skills may take longer to master.
Should I color my dress sketches?
Coloring is optional but highly recommended. Adding color helps showcase fabric choices, design details, and overall creativity. Colored pencils, markers, and digital tools can all be used effectively.
How do fashion designers sketch dresses so quickly?
Professional fashion designers practice drawing every day. Over time, they memorize body proportions, garment structures, and fabric behavior, allowing them to sketch concepts quickly and confidently.
What mistakes should beginners avoid when drawing dresses?
Common mistakes include skipping the body structure, drawing random folds, using dark lines too early, ignoring symmetry, and adding details before establishing the main dress shape.
Conclusion
Learning how to draw a dress step by step is a rewarding skill that combines creativity, observation, and artistic technique. Whether your goal is to become a fashion designer, improve your illustration skills, or simply enjoy drawing as a hobby, understanding the fundamentals of dress construction can dramatically improve your artwork.
The most effective approach is to start with basic dress shapes, practice body proportions, and gradually learn how different fabrics move and fold. As your confidence grows, you can experiment with various dress styles, including A-line dresses, ball gowns, wedding dresses, mermaid silhouettes, and custom fashion designs.
Remember that every great fashion illustrator started as a beginner. Consistent practice, studying real garments, and experimenting with new techniques will help you develop your own unique style. The more dresses you sketch, the better your understanding of form, movement, texture, and design will become.
By following the techniques outlined in this guide and practicing regularly, you’ll be able to create beautiful, professional-looking dress illustrations and transform your fashion ideas into stunning visual designs.