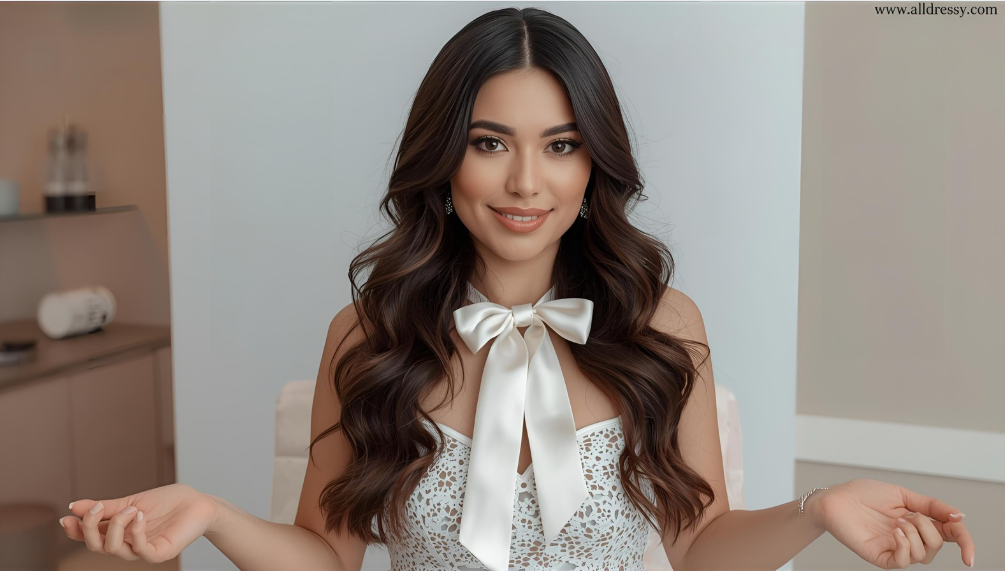
A bow can transform an ordinary dress into an elegant, stylish, and eye-catching outfit. Knowing how to tie perfect bow on dress is a skill that can instantly elevate your look for formal events, casual outings, weddings, or evening parties. The right bow adds dimension, enhances femininity, and complements the dress’s silhouette, creating a polished and sophisticated impression.
Many people struggle to tie bows neatly, resulting in uneven loops, slipping knots, or mismatched proportions. Learning the correct techniques, understanding different bow styles, and considering fabric and dress type are essential to mastering this art. This guide will provide step-by-step instructions, styling ideas, fabric-specific tips, professional hacks, and creative variations to help you tie the perfect bow on any dress.
Why a Perfect Bow Matters
Understanding the impact of a well-tied bow highlights why this skill is worth mastering:
- Enhances Dress Style: A bow can turn a simple dress into a statement piece.
- Defines Waistline: Cinching at the waist with a bow creates flattering proportions.
- Adds Visual Interest: Provides texture and depth, especially for monochrome dresses.
- Expresses Personality: Different bow styles can reflect elegance, playfulness, or sophistication.
- Completes the Look: A bow adds finishing touches that demonstrate attention to detail and style awareness.
Choosing the Right Dress for a Bow
Not all dresses are suitable for bows. Consider these options when learning how to tie perfect bow on dress:
1. Wrap Dresses
- Features: Built-in ties or belts, flexible fabric.
- Bow Placement: Waist or side, creating a flattering cinch.
- Tip: Use long, soft ties for larger, dramatic bows.
2. Fit-and-Flare Dresses
- Features: Fitted waist, flared skirt.
- Bow Placement: Centered at the waist for elegance.
- Tip: Choose moderate-sized bows to avoid overwhelming the flared skirt.
3. Sheath Dresses
- Features: Slim, straight silhouette.
- Bow Placement: Side or back to add dimension without bulk.
- Tip: Narrow bows maintain the sleek silhouette.
4. Shift Dresses
- Features: Loose fit, minimal waist definition.
- Bow Placement: Optional detachable belt or sash for waist definition.
- Tip: A bow can add structure and interest without altering the dress’s casual style.
5. Maxi Dresses
- Features: Flowing, long fabric.
- Bow Placement: High waist, empire line, or shoulder tie.
- Tip: Dramatic, oversized bows complement the length and elegance of maxi dresses.
Selecting the Right Material for Tying a Bow
Fabric choice significantly affects bow appearance and ease of tying:
1. Satin or Silk
- Smooth and shiny, perfect for elegant, formal bows.
- Slightly slippery; use careful loops to prevent slipping.
2. Cotton or Linen
- Holds shape well, ideal for casual or daytime bows.
- Stiffer fabrics allow bows to stay upright without drooping.
3. Chiffon or Organza
- Lightweight, airy; creates soft, flowing bows.
- Layer multiple strands for volume and definition.
4. Velvet or Brocade
- Thick, textured fabrics; ideal for dramatic, statement bows.
- Ensure adequate fabric length for proportional loops.
5. Jersey or Knit
- Stretchy and casual, suitable for soft, relaxed bows.
- Avoid tight loops that may distort fabric tension.
Tools and Accessories to Help Tie the Perfect Bow
- Mirror: Essential for symmetry checking.
- Pins or Clips: Hold loops temporarily for even placement.
- Fabric Starch or Spray: Adds stiffness to soft fabrics.
- Double-Sided Fashion Tape: Keeps bow in place on slippery fabrics.
- Optional Belt or Sash: If dress doesn’t have a built-in tie, create a bow using a separate sash.
Step-by-Step Guide: How to Tie Perfect Bow on Dress
Step 1: Determine Placement
- Choose where the bow will sit: waist, back, side, or shoulder.
- Consider proportions and dress silhouette for balance.
Step 2: Measure Fabric or Tie Length
- Ensure sufficient length for loops and tails.
- Longer bows suit maxi dresses, while shorter bows suit sheath or shift dresses.
Step 3: Create the First Loop
- Hold one end of the tie in your hand.
- Form a loop (like starting a shoelace knot) at the desired side.
Step 4: Wrap Around for the Second Loop
- Take the other end of the tie and wrap around the first loop.
- Pull through to form the second loop.
Step 5: Adjust Loop Size
- Even out both loops by pulling gently.
- Ensure loops are symmetrical and proportional to the dress.
Step 6: Secure the Knot
- Pull tails gently to tighten the bow without causing puckering.
- Use pins or fashion tape for slippery fabrics to maintain shape.
Step 7: Arrange Tails
- Decide on straight, angled, or curled tails.
- Press, twist, or drape tails for desired aesthetic.
Step 8: Final Check
- Stand in front of a mirror to ensure symmetry and balance.
- Adjust as needed for proportions relative to the dress silhouette.
Variations of Bow Styles
Mastering how to tie perfect bow on dress includes learning different bow types for various occasions:
1. Classic Bow
- Symmetrical loops and tails, versatile for any dress type.
2. Side Bow
- Positioned at the side waist or hip for playful, modern look.
3. Oversized Statement Bow
- Large loops and tails, ideal for formal gowns or festive events.
4. Small, Delicate Bow
- Subtle, elegant bow for sheath or shift dresses.
5. Double Bow
- Two stacked loops for layered, voluminous effect.
6. Back Bow
- Positioned at the back waist or shoulder for dramatic impact.
7. Asymmetrical Bow
- Uneven loops and tails for artistic, contemporary style.
Styling Tips for Perfect Bow Integration
- Dress Proportions: Match bow size to dress silhouette. Large bows suit flowing skirts; small bows complement slim styles.
- Fabric Care: Lightly iron or press fabric before tying to avoid wrinkles.
- Layered Bow Effect: Fold or twist fabric for extra volume in airy materials.
- Matching Accessories: Coordinate bow color or texture with shoes, belts, or jewelry for cohesion.
- Seasonal Styling: Heavier fabrics like velvet for winter, chiffon for summer, to maintain bow structure.
- Movement Consideration: Ensure bow doesn’t interfere with walking or sitting by checking placement and tail length.
Common Mistakes to Avoid
- Uneven loops or tails.
- Bow too large or too small for dress silhouette.
- Slipping bows on silky or slippery fabrics.
- Tying too tightly, causing puckering or distortion.
- Incorrect placement affecting dress balance.
- Neglecting final adjustments; always check symmetry.
Professional Tips for a Polished Bow
- Use Starch for Soft Fabrics: Adds stiffness to silky or chiffon fabrics.
- Double Knot Base: Ensures bow stays secure during movement.
- Mirror Check: Always adjust loops and tails while facing a mirror.
- Iron After Tying: Lightly press bow loops for crisp, elegant edges.
- Layering Technique: For fuller bows, layer multiple strips of fabric before tying.
- Detachable Sashes: Allows repositioning or replacing bows without altering the dress.
Fabric-Specific Bow Tips
- Silk & Satin: Use fashion tape or double knots to prevent slipping.
- Cotton & Linen: Fabric holds shape naturally; loops stay upright.
- Chiffon & Organza: Layer multiple strands for volume and structure.
- Velvet: Heavy fabric requires longer loops; pin in place if needed.
- Stretch Jersey: Avoid tight loops; relaxed bows look better on knit fabrics.
Creative Ways to Enhance Your Bow
- Layer with Ribbons: Mix textures or colors for a unique effect.
- Add Brooch or Pin: Secure the center for sparkle and extra hold.
- Curl Tails: Use heat or rolling techniques for whimsical, flowing ends.
- Incorporate Belt Loops: Thread bow through belt loops for extra security.
- Side Draped Bow: Extend tail over hip or shoulder for dramatic flow.
Using Bows for Special Occasions
Weddings
- Oversized satin bow at waist for bridal gowns.
- Delicate chiffon bow on bridesmaid dresses.
Prom or Formal Events
- Statement bows at the back or side of fitted gowns.
- Layered bows for visual impact on evening dresses.
Casual Outings
- Small side bow for cotton sundress.
- Knotted bows for shirt dresses or casual maxis.
Office or Work Events
- Classic, neat bow at the waist or neck.
- Keep loops moderate in size for professionalism.
Seasonal and Accessory Considerations
- Summer Dresses: Lightweight fabrics, airy loops, short tails.
- Winter Dresses: Velvet or satin, oversized, dramatic bows.
- Accessories: Match bow color with shoes, clutch, or belt.
- Layering: Cardigans or blazers should not flatten the bow; adjust loops accordingly.
FAQs About How to Tie Perfect Bow on Dress
1. Can I tie a perfect bow on any type of dress?
Most dresses with a waistline, sash, belt, or tieable fabric can be transformed with a bow. Maxi, midi, shift, and wrap dresses are particularly suitable, while very fitted or structured dresses may require detachable sashes.
2. How do I prevent the bow from slipping?
Use double knots at the base, fashion tape for slippery fabrics like satin, or fabric starch for added stiffness. Layering the fabric can also improve hold.
3. How can I make the bow symmetrical?
Stand in front of a mirror while tying and adjust loops and tails gradually. Use pins temporarily for tricky fabrics until the bow is secure.
4. Can I tie a bow on the back of a dress?
Yes. Back bows work well for evening gowns, wrap dresses, or formal occasions. Ensure the loops and tails are proportional to avoid bulk or imbalance.
5. Are there different types of bows I can try?
Yes. Popular options include classic bows, side bows, oversized statement bows, small delicate bows, double bows, back bows, and asymmetrical bows. Each creates a unique aesthetic.
6. Does fabric type affect bow appearance?
Absolutely. Stiffer fabrics like cotton and linen hold shape well, while soft fabrics like silk and chiffon may need layering, pins, or starch to maintain loops. Velvet and brocade are ideal for dramatic, large bows.
7. How do I tie a bow without making it bulky?
Keep loops proportional to the dress and avoid excessive fabric. For thicker fabrics, slightly smaller loops or layered loops can reduce bulk while maintaining elegance.
8. Can I use a separate sash to tie a bow on a dress?
Yes. If your dress lacks a built-in tie, use a matching or contrasting sash to create the bow. This allows flexibility in placement, size, and style.
Conclusion
Mastering how to tie perfect bow on dress is a versatile fashion skill that can instantly enhance the elegance, femininity, and visual appeal of any outfit. Whether for casual wear, office settings, formal events, or special occasions, a well-tied bow adds dimension, defines the waistline, and showcases attention to detail.
By understanding dress types, fabric characteristics, and proper tying techniques, you can create bows that complement your dress’s silhouette while maintaining balance and proportion. Experimenting with different bow styles—classic, side, oversized, or asymmetrical—allows for endless outfit creativity and personalization.
Ultimately, a perfectly tied bow is more than just a decorative accessory—it is a statement of style, confidence, and sophistication. With practice, attention to detail, and a few professional tips, you can master this skill and elevate your wardrobe with elegance and flair every time you dress.