
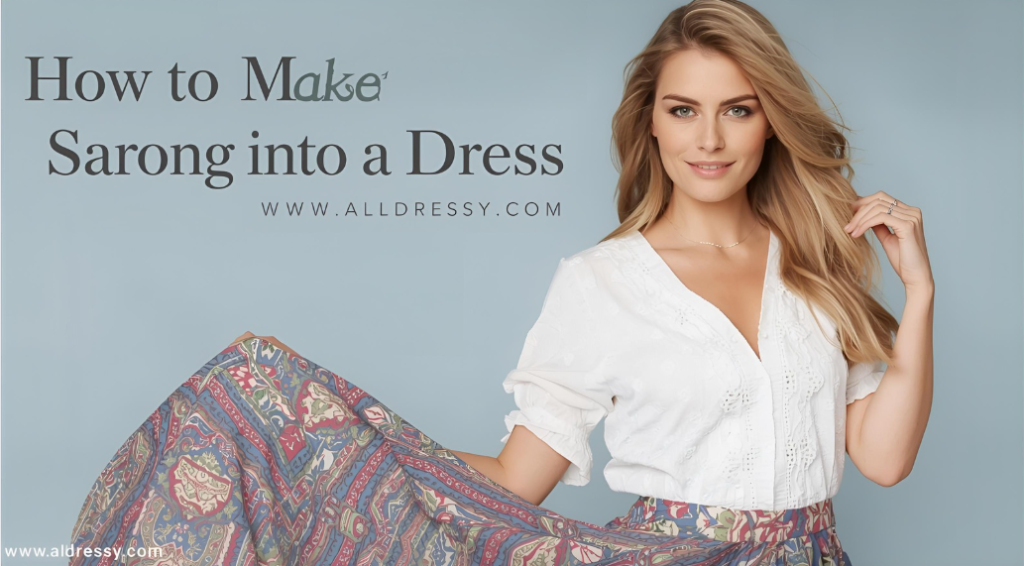
The humble sarong is a powerhouse of potential, sitting in your drawer or suitcase, waiting for its moment to shine. More than just a beach cover-up, this versatile rectangle of fabric is a passport to a world of instant, elegant, and creative fashion. If you’ve ever wondered how to make a sarong into a dress that is both stylish and secure, you’ve come to the right place. This skill is the ultimate style hack for travellers, minimalist wardrobes, and anyone who loves a quick, customisable outfit transformation.
Learning how to make a sarong into a dress requires no sewing, no complicated patterns, and no prior experience. It requires only a sarong, a few simple techniques, and a dash of confidence. This comprehensive guide will serve as your ultimate resource, moving beyond the basic wrap-and-tie to explore sophisticated wraps, secure knots, and styling tricks that will turn your simple sarong into a stunning, photo-ready dress for any occasion. We will cover techniques for every body type, how to choose the right sarong, and essential accessories that complete the look. Get ready to unlock the full potential of your fabric and discover just how easy it is to create a beautiful, one-of-a-kind dress in minutes.
The Foundation: Choosing Your Sarong and Essential Tools
Before you start twisting and tying, the first step in mastering how to make a sarong into a dress is ensuring you have the right materials. Not all sarongs are created equal, and the right choice will make the process infinitely easier and the result more flattering.
1. The Ideal Sarong for Dress-Making:
- Dimensions: A standard sarong is typically around 44 inches wide and 66 inches long. This is a versatile size for most wraps. For taller individuals or styles requiring more fabric for draping, look for “maxi” sarongs or pareos that can be 72 inches or longer.
- Fabric: The fabric’s drape and weight are crucial.
- Lightweight Cotton or Viscose: Perfect for a fluid, breezy dress that ties easily and stays put. Ideal for hot weather.
- Silk or Satin: Creates an elegant, luxurious look for evening wear but can be slippery. These fabrics often require more secure fastening methods.
- Jersey Knit: Offers stretch and comfort, making it very forgiving and easy to wrap. It’s less prone to loosening throughout the day.
- Beach Sarong (Rayon Blend): Often features vibrant prints and has a good, medium-weight drape that is excellent for most tying techniques.
2. Your Secret Weapon: Accessories for Security and Style
While you can create a dress with just the sarong, a few small accessories will transform your experience from precarious to perfectly secure.
- Sarong Clips or Fashion Rings: These are specially designed clips or rings that you thread the fabric through to create a secure hold without knots.
- A Decorative Belt or Sash: This is the single most important tool. A belt can cinch the waist, create shape, and, most importantly, hold everything in place.
- Safety Pins or Fashion Tape: For ultimate peace of mind, especially with slippery fabrics, keep a few small safety pins or double-sided fashion tape on hand for invisible reinforcement.
- A Statement Brooch: Can be used to pin straps together or secure a wrap front for a touch of vintage glamour.
The Basic Techniques: Foundational Wraps for Every Beginner
These three foundational methods are the cornerstone of knowing how to make a sarong into a dress. Master these, and you can create a reliable outfit in under a minute.
1. The Classic Wrap Dress
This is the most intuitive and universally flattering method.
- Step 1: Hold the sarong horizontally behind your back, ensuring it is centered.
- Step 2: Bring the two ends to the front, crossing them over your chest. Adjust the height so the top edge is where you want your neckline to be.
- Step 3: Tie a secure knot or two at your side, just under your arm. You can place the knot high up for more coverage or lower down for a deeper V-neck.
- Step 4: Adjust the fabric over your bust and smooth it down over your torso. You can leave it as a straight skirt or twist the front panel for a more fitted look.
2. The Halter Neck Dress
This style offers excellent bust support and a beautiful, open-back silhouette.
- Step 1: Hold the sarong horizontally behind your back, but this time, place the middle of the fabric against the small of your back.
- Step 2: Bring the two ends up to the front, around your neck. Cross them over your chest.
- Step 3: Tie the ends securely behind your neck in a double knot.
- Step 4: Take the loose fabric hanging in the front and pull it down between your legs, up through the back, and tuck the end into the waistband you’ve created at the back. This creates a secure, one-piece dress. For a simpler version, just wrap the remaining fabric around your body and tuck it in at the side.
3. The One-Shoulder Goddess Dress
Elegant, dramatic, and surprisingly simple to achieve.
- Step 1: Hold one corner of the sarong and place it on the shoulder opposite to where you want the dress to sit (e.g., for a right-shoulder dress, start on the left shoulder).
- Step 2: Drape the fabric diagonally across your body, covering the front and back.
- Step 3: Bring the long end under your opposite arm and then twist it and bring it back up to your starting shoulder.
- Step 4: Tie the two corners together securely on your shoulder. Use a brooch for extra security and style. Adjust the drape to your liking.
Advanced Styling: Elevating Your Sarong Dress
Once you’ve mastered the basics, it’s time to explore more creative and secure ways of how to make a sarong into a dress that looks like it came from a high-end boutique.
1. The Knotted Detail Dress
This technique adds visual interest and a custom fit.
- Start with the Classic Wrap Dress foundation but do not tie the final knot.
- Instead of a simple knot, take the two ends and tie a series of 2-3 small, tight knots down the length of the ends, creating a knotted strap.
- Wrap this knotted strap around your body and tuck the end into the top of the dress on the opposite side. This creates a unique, textured detail that is far more secure than a single knot.
2. The Belted Bustier Dress
This method creates a structured, fitted bodice using a wide belt.
- Step 1: Hold the sarong vertically and wrap it around your body, aligning the top edge just under your arms, creating a tube top effect.
- Step 2: Secure the top edge by folding it over once to create a clean hem, then take a wide, non-stretch belt and cinch it tightly over the fabric, right under your bust. This will create a bustier-like support.
- Step 3: The fabric below the belt becomes the skirt. You can adjust its length by pulling more or less fabric from the top before belting.
3. The Layered Twist Dress
A sophisticated look that provides excellent coverage and movement.
- Step 1: Drape the sarong around your body in the Classic Wrap style, but leave the ends untied.
- Step 2: Take the two front ends and twist them together tightly several times.
- Step 3: Wrap the twisted fabric around your waist like a rope and tuck the ends neatly in at the back or side. The twisting action creates a beautiful texture and a very secure hold.
Securing Your Creation: How to Keep Your Sarong Dress in Place All Day
The biggest concern when learning how to make a sarong into a dress is security. A loose knot can lead to a fashion emergency. Here are professional tricks to ensure your dress stays put.
- The Double-Knot Rule: Never rely on a single knot. Always follow up with a second, tight double knot.
- The Tuck-and-Roll: After tying your knots, tuck the loose ends of the fabric back into the waistband or under another layer of fabric. This hides the ends and adds friction, preventing the knot from coming undone.
- Strategic Safety Pinning: From the inside of the dress, use a small safety pin to connect the layers of fabric at key stress points, such as at the shoulder of a halter neck or the side of a wrap dress. Pin through the knot itself for an invisible lock.
- Fashion Tape is Your Friend: Apply small pieces of double-sided fashion tape along the top edge of the dress (on your skin) and at the cross-over points on the bust to prevent gaping and slipping.
Styling Your Sarong Dress for Any Occasion
A sarong dress is a blank canvas. Your accessories and footwear will define its character.
- For a Beach-to-Bar Look:
- Accessories: Pair with stacked wooden bangles, large straw hat, and oversized sunglasses.
- Footwear: Leather sandals or espadrilles.
- Tips: Leave your hair loose and wavy. Choose a bright, colourful sarong print.
- For an Elegant Evening Out:
- Accessories: Swap the beach belt for a thin, metallic or leather belt. Add statement drop earrings and a clutch bag.
- Footwear: Wedges or strappy high heels.
- Tips: Opt for a sarong in a solid, jewel-toned colour or an elegant, abstract print. A slicked-back bun elevates the look instantly.
- For a Daytime Casual Look:
- Accessories: A denim jacket thrown over the shoulders, a cross-body bag, and simple hoop earrings.
- Footwear: White sneakers or flat sandals.
- Tips: A cotton sarong in a gingham or stripe pattern works perfectly for this effortless, cool-girl vibe.
Troubleshooting and Pro Tips for Every Body
Knowing how to make a sarong into a dress also means knowing how to adapt it to your unique shape.
- For a Fuller Bust: The Halter Neck and Knotted Detail dresses offer the best support. Always use a wide belt under the bust to create a secure base. Avoid the simple One-Shoulder style as it may not provide enough support.
- For a Petite Frame: Avoid being swallowed by fabric. Choose a smaller sarong or one in a thin, lightweight fabric. The Classic Wrap Dress tied high on the side will create a longer leg line. Cuff the hem if it’s too long.
- For a Pear Shape: Create balance by drawing the eye upward. Use a detailed halter neck or one-shoulder style. A belt cinched at your natural waist will highlight your smallest point.
- For a Straight Figure: Create curves with strategic draping. The belted bustier method will create the illusion of a bust and hips. Twist and tuck the fabric at the hip to add volume.
Frequently Asked Questions (FAQs)
What is the most secure way to tie a sarong dress?
The most secure method is a combination of techniques. Start with a foundational wrap like the Halter Neck or Classic Wrap, but secure it with a double knot. Then, use a wide belt cinched tightly over the fabric at the waist. Finally, for absolute peace of mind, use a few small safety pins on the inside of the dress to pin layers together at key points like the shoulder or side knot.
Can I make a sarong dress without tying it at the shoulder?
Absolutely. The Belted Bustier method is an excellent way to create a dress without shoulder ties. By wrapping the sarong like a tube top and using a strong, wide belt to secure it under the bust, you create a secure bodice that relies on the belt’s tension rather than shoulder knots. This is a great option for those who find shoulder ties uncomfortable.
How do I choose the right size sarong for my height?
For individuals under 5’4″, a standard 66-inch long sarong is perfect for knee-length to midi dresses. For those between 5’5″ and 5’8″, a 66-inch sarong will typically be a midi length. For anyone over 5’8″ or for a desired floor-length look, seek out sarongs that are 72 inches or longer to ensure you have enough fabric for comfortable wrapping and draping.
My sarong is slipping because the fabric is too silky. What can I do?
Slippery fabrics like silk and satin require extra grip. First, use double-sided fashion tape along the top edge to adhere the fabric to your skin. Second, when you tie your knots, make them double or even triple knots. Third, after tying, tuck the ends back into the dress securely. Finally, a wide, non-slip belt (like leather or woven fabric) over the top will lock everything in place.
Can I create a sarong dress that has sleeves?
While you cannot create fitted sleeves, you can create elegant drapey sleeves. For a one-shoulder dress, you can leave extra fabric at the shoulder to drape down the arm like a cape sleeve. Alternatively, in the Classic Wrap, before tying the side knot, you can gather a section of the fabric on your arm to create a small, puff-like detail. True, functional sleeves require sewing.
Conclusion: Unleash Your Inner Stylist with a Simple Sarong
Learning how to make a sarong into a dress is more than just a clever travel hack; it’s a masterclass in creativity, resourcefulness, and understanding the principles of drape and shape. This single piece of fabric can be your go-to for a day at the beach, a romantic dinner, a casual brunch, or a summer party, all depending on how you choose to transform it.
You now possess a vast toolkit of techniques, from the foundational wraps to advanced, secure styling methods. You know how to choose the right sarong, which accessories are essential for security, and how to style the final look for any event. The true beauty of this skill is its empowerment. You are no longer limited by what’s in your suitcase or wardrobe; you are equipped to create a unique, flattering, and beautiful dress anytime, anywhere. So, dig out that beautiful sarong you’ve been saving, practice these ties in front of the mirror, and step out with the confidence that comes from knowing you’ve created something truly special with your own two hands.