Lacing a corset dress by yourself may sound intimidating—especially if it’s for a special event like a wedding, prom, or photo shoot. But once you understand the mechanics of corset structure, lacing patterns, and solo techniques, it becomes a manageable (even empowering) skill. Whether you’re wearing a modern corset-back prom gown, a bridal dress, or a vintage corset, learning to lace it on your own means independence, perfect fit, and total control over your look.
This comprehensive guide will teach you exactly how to lace a corset dress by yourself—from preparation to lacing techniques, tightening zones, adjusting fit, and final styling.
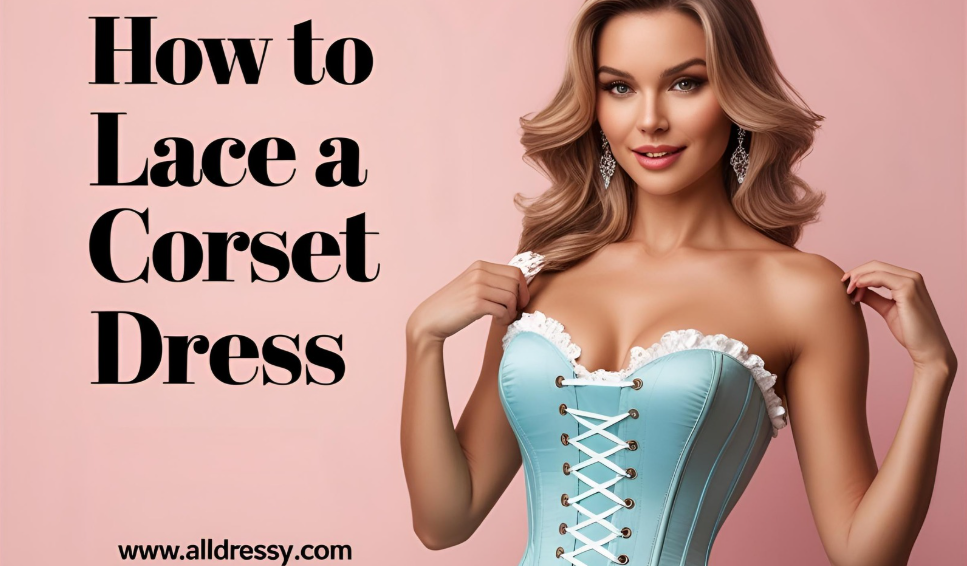
🔍 Understanding the Structure of a Corset Dress
Before you begin lacing, it’s crucial to understand what makes up a corset dress. This knowledge helps you visualise the process and troubleshoot any issues during lacing.
1. Grommets or Eyelets
These are the reinforced holes along the back opening of the corset through which the laces thread. Grommets are typically metal-lined for strength, while eyelets may be stitched.
2. Modesty Panel
A flap of fabric behind the lacing section, often sewn into the dress or detachable. It provides a layer between your skin and the laces, offering coverage and preventing pinching.
3. Boning
Thin, flexible strips (often plastic or steel) inserted into vertical channels of the bodice. Boning shapes the torso and supports posture while wearing the corset.
4. Waist Tape
An internal ribbon sewn into many corset dresses to reinforce the waistline and maintain structure during tightening.
Understanding these components ensures you handle the garment gently and effectively.
🧰 What You’ll Need
To lace a corset dress by yourself, prepare the following items:
- Strong corset laces or ribbon (preferably 2.5–3 times the length of the opening)
- Full-length mirror
- Handheld or wall-mounted rear view mirror
- Modesty panel (if not attached)
- Safety pins, fashion tape, or small clips
- Comfortable space with good lighting
- Optional: Door knob, coat hook, or furniture post to anchor laces during tightening
🪡 Step 1: Pre-Lace the Dress Off the Body
Before you put on your dress, lace most of the back while it’s off your body. This technique, known as pre-lacing, makes the process easier once the dress is on.
How to Pre-Lace:
- Lay the dress flat or hang it on a sturdy hanger.
- Thread the lace through the topmost grommets, entering from the outside in (this creates clean exterior loops).
- Pull both ends evenly to ensure symmetry.
- Begin a crisis-cross pattern down the grommets:
- Left lace goes through the next right eyelet from the outside.
- Right lace goes through the next left eyelet.
- Left lace goes through the next right eyelet from the outside.
- Continue until you reach about two-thirds of the way down.
- Stop threading at the waist level and leave the bottom third open. This will give you enough room to step into or pull the dress on without unlacing it entirely.
- Ensure the laces are even and smooth.
Pro Tip: Some people like to form “bunny ears” at the waist section—two loops that help you cinch the waist later on.
👗 Step 2: Put On the Corset Dress
Depending on the design, corset dresses are worn by either stepping into them or slipping them over the head.
Guidelines:
- Loosen the pre-laced corset slightly so you can slide into it easily.
- Step into the dress or pull it over your head gently.
- Position the bust cups or bodice in place.
- Align the side seams of the dress with your body for symmetry.
- Make sure the modesty panel is smooth and in position (tuck it under the lacing if it’s not attached).
At this stage, the dress will feel loose. That’s okay—you’ll tighten it in the next steps.
🧷 Step 3: Secure the Modesty Panel
If your dress includes a modesty panel (and most corset dresses do), take a moment to smooth it out behind the grommet section.
- Tuck it in carefully behind the lacing.
- Ensure it extends fully across the open back area.
- If the panel is separate or tends to shift, secure it with clips or safety pins at the top and bottom until the lacing is tightened enough to hold it in place.
- Avoid bunching or folding, which can cause discomfort and uneven lacing.
🔄 Step 4: Tighten the Corset in Sections
The key to lacing a corset by yourself is tightening in stages—working from top to bottom in sections, rather than pulling everything at once.
Section 1: Bust and Upper Back
- Start at the top of the lacing.
- Pull outward on each X-shaped cross to tighten gently.
- Use your elbows or one hand to brace one side while pulling the other.
- Focus on smoothing the modesty panel as you go.
Section 2: Waist (Main Cinch Point)
- Grab the bunny ears if you created them earlier.
- Pull both loops outward and downward to cinch the waist.
- This section should be the most snug—but never painful.
- If you’re alone, you can tie the bunny ears temporarily to a door knob or drawer handle to hold tension.
Section 3: Hips and Lower Back
- Continue pulling the remaining lace crosses downward.
- This section should be comfortably snug but allow movement.
- Leave enough room to sit and walk without pinching or restriction.
🪢 Step 5: Tie Off the Laces
Once you’re satisfied with the overall tension, it’s time to secure your laces. You have several options, depending on lace length and personal preference.
1. Waist Tie (Most Common)
- Tie the bunny ears into a bow at the small of your back.
- Secure with a double knot for stability.
- Tuck excess ribbon inside the corset or modesty panel.
2. Bottom Tie
- If you laced all the way to the bottom, tie the laces at the last grommet.
- This creates a longer back opening but maintains structure.
3. Wrap-Around Tie
- If your laces are very long, wrap them around to the front and tie at the waistline.
- This adds a stylistic touch and allows easier adjustment later.
🪞 Step 6: Check Symmetry and Fit
After tying the laces, assess your work from both front and back:
- Use your mirrors to inspect for even spacing between grommets.
- Check that the modesty panel lies flat and covers all gaps.
- Ensure the dress sits correctly on your waist, bust, and hips.
- Run your fingers along the laces to feel for any inconsistent tension.
If something feels off, don’t hesitate to untie and adjust. Minor tweaks make a big difference in comfort and appearance.
🧍 Step 7: Movement Test
Before heading out, it’s important to test how the dress performs during motion. A corset dress that looks good but restricts movement will make your experience uncomfortable.
Movement Checklist:
- Take a deep breath: Can you inhale comfortably?
- Raise your arms: Is there enough give at the underarms and bust?
- Sit down gently: Is the corset too tight around the hips or ribs?
- Walk a few steps: Are the laces pulling or shifting?
- Twist your torso: Any pinching or stiffness?
If you feel too restricted or notice asymmetry during these movements, make small adjustments at the relevant section of lacing.
🧼 Bonus Tips for Styling and Care
Even after your corset is perfectly laced, small details matter. Here’s how to elevate your final look and preserve your corset dress:
Smoothing the Silhouette
- Use shapewear beneath the dress to enhance smoothing.
- Avoid undergarments with thick seams or texture.
Choosing the Right Lace
- For formal occasions, match the lace color with the dress or contrast it for style.
- Upgrade to decorative laces (like satin or velvet) for visual flair.
Tucking the Bow
- Hide the tied laces inside the corset for a clean, seamless back.
- Alternatively, let a decorative bow hang loose as a style element.
Cleaning the Dress
- Always unlace completely before cleaning or storing.
- Hand wash or dry clean according to fabric care instructions.
- Store flat or hung in a garment bag to prevent stretching.
❓ Frequently Asked Questions (FAQs)
1. Is it possible to lace a corset dress by yourself?
Yes! With the right tools, setup, and technique, you can successfully lace a corset dress by yourself. Using mirrors, pre-lacing strategies, and anchoring techniques makes it manageable and rewarding.
2. How long does it take to lace a corset dress alone?
For most people, it takes 10 to 20 minutes to lace a corset dress by themselves. The time may be shorter with practice or longer for more complex dress structures.
3. What kind of ribbon or lace should I use for corset dresses?
Use non-stretch, strong materials such as:
- Satin ribbon (1–1.5 inches wide)
- Polyester corset laces
- Flat nylon lacing
Avoid stretchy or thin ribbons as they can snap or loosen under pressure.
4. How tight should a corset dress be?
A corset dress should feel secure and supportive, not painful. You should be able to breathe, move, and sit comfortably. The waist should feel snug while the bust and hips have enough give for mobility.
5. Do I need a modesty panel?
While not strictly required, a modesty panel improves comfort, hides skin between the laces, and enhances the finished look—especially in backless or strapless dresses.
6. Can I tie the corset in the front instead of the back?
Yes. If your laces are long enough, you can wrap them around the waist and tie at the front. This adds style and allows easier readjustment during the day or night.
7. How can I tell if my lacing is uneven?
Use a mirror setup to check spacing between grommets on both sides. Uneven lacing will show as crooked lines or extra tension on one side. Feel along the laces to check for consistent tightness.
🎀 Conclusion
Lacing a corset dress by yourself might seem overwhelming at first, but with a little practice, it becomes a smooth and even empowering process. Whether you’re preparing for a prom, wedding, formal event, or simply love the elegance of corset fashion, being able to lace your dress solo gives you independence, control, and confidence.
From pre-lacing off-body to section-tightening and securing the final bow, each step contributes to a custom, flattering fit. And with proper tools and a bit of patience, the process becomes not only possible but enjoyable.
You don’t need a second pair of hands to look and feel stunning in a corset dress. With this guide, you’ve got all the knowledge to lace up perfectly—every time.