If you’ve ever been captivated by the elegance of ruffled skirts, layers of lace, and soft flowing fabric, then learning how to draw a frilly dress is a perfect way to express your creativity. Frilly dresses, often seen in fashion sketches, fairytale illustrations, anime, and costume design, symbolize femininity, grace, and sophistication.
Whether you’re a beginner artist, a fashion design student, or a digital illustrator, mastering how to draw a frilly dress can dramatically improve your drawing skills. This comprehensive 2000-word guide explains every step—from the basic body outline to complex frills, lace, and shading—so your sketches look professional, elegant, and full of life.
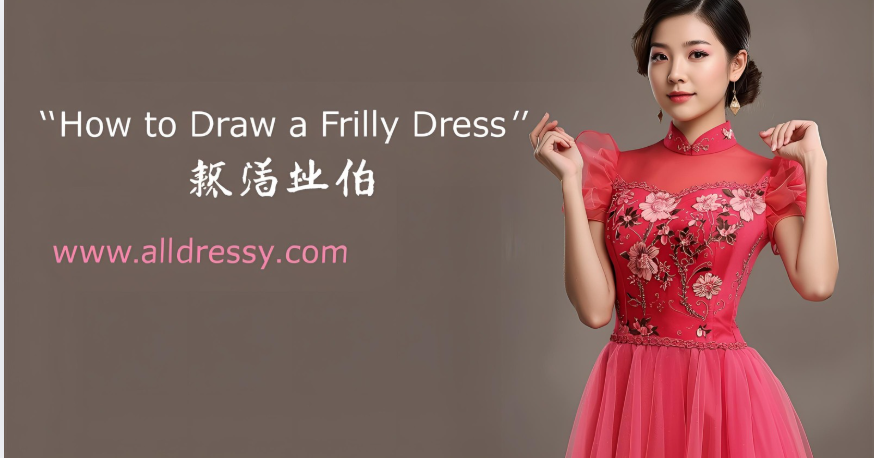
👗 Introduction to How to Draw a Frilly Dress

Learning how to draw a frilly dress involves more than just sketching fabric—it’s about understanding how layers, ruffles, and folds interact with light and motion. Frills add depth and personality to your design, making the dress appear dynamic and textured.
Frilly dresses are common in:
- Anime and manga fashion illustrations
- Bridal or prom gown design
- Victorian, Lolita, or Rococo style fashion
- Children’s fairytale illustrations
By the end of this guide, you’ll know exactly how to draw a frilly dress that looks realistic and beautiful—complete with movement, volume, and fine details.
✏️ What You’ll Need to Draw a Frilly Dress
Before you begin, gather your basic drawing tools. Having the right supplies helps you focus on technique and detail.
Essential Materials:
- Sketchbook or quality drawing paper
- Graphite pencils (HB for base, 2B–4B for shading)
- Eraser and sharpener
- Ruler (for symmetry and alignment)
- Blending stump or cotton swab
- Fine liner or pen (for final outlines)
- Colored pencils or markers (optional for coloring)
💃 Understanding the Structure Before You Draw
When learning how to draw a frilly dress, the first step is understanding structure. Even though frills look soft and random, they follow natural movement rules based on the figure’s pose.
Key Structure Points:
- Torso and Waist: Define how the fabric will sit.
- Hips and Legs: Control the shape and direction of the skirt.
- Arms and Shoulders: Affect sleeve design and upper frills.
- Movement: Frills should always follow body motion or wind direction.
🖋️ Step-by-Step Guide: How to Draw a Frilly Dress
Now let’s break down how to draw a frilly dress step by step, from foundation to finishing touches.
Step 1: Draw the Body Outline
Start with the basic human figure to ensure correct proportion.
- Draw a vertical line for balance.
- Sketch a head, shoulders, torso, waist, and hips using simple shapes (circles and ovals).
- Lightly indicate arms and legs with smooth lines.
- Keep the proportions realistic—shoulders slightly narrower than hips for feminine balance.
🖊️ Tip: Use light pencil pressure for the body so you can erase easily later.
Step 2: Define the Pose
A frilly dress looks best in motion—try a walking, spinning, or curtsying pose.
You can use one of these ideas:
- Bride holding her skirt slightly.
- Dancer twirling, with fabric flowing outward.
- Elegant standing pose with slight tilt for softness.
The pose determines where the frills will curve or flutter.
Step 3: Outline the Dress Silhouette
Now draw the basic shape of your frilly dress over the figure.
Common silhouettes for frilly dresses include:
- A-Line: Simple and flared; perfect for beginners.
- Ball Gown: Large, puffy, dramatic skirt full of layers.
- Lolita Style: Mid-length with multiple ruffles.
- Victorian Style: High waist and long flowy bottom.
Use soft, wavy lines instead of straight ones. Frills are never rigid—they always curve with gravity or motion.
Step 4: Draw the Frill Layers
Here’s where the magic begins—adding ruffles, lace, and volume.
Each layer of frill is like a small wave. To draw realistic frills:
- Start from the waistline or dress hem.
- Draw a wavy line—gentle up-and-down curves.
- Add another line beneath it, following the same shape to show fabric thickness.
- Connect them with short vertical strokes to form ruffles.
Repeat for multiple layers—each slightly overlapping the one above.
🩰 Tip: The closer the curves, the finer and softer the frill. The larger the wave, the fluffier it looks.
Step 5: Add Bodice Details
Now design the top part of your frilly dress—the bodice.
Popular bodice styles for frilly dresses:
- Sweetheart neckline
- Square neckline with lace trim
- Off-shoulder with ruffles
- High-collar Victorian style
Add small bows, ribbons, or tiny frills along the neckline and sleeves for extra charm.
Step 6: Add Fabric Folds and Volume
To make your frilly dress look three-dimensional:
- Draw fold lines inside the skirt using light, curved strokes.
- Thicker areas of shading = fabric gathering.
- Lighter areas = raised or stretched fabric.
- Use diagonal curves to show fabric spreading outward during motion.
🖌️ Imagine how the dress moves—does the wind lift it slightly? Is the bride spinning? Draw accordingly.
Step 7: Add Lace and Decorative Details
Frilly dresses often have delicate lacework or embroidery. Here’s how to draw them easily:
- Use tiny curved or circular patterns to form lace edges.
- Add mini floral or swirl shapes along the borders.
- For simplicity, draw repetitive patterns that imply texture instead of illustrating every stitch.
🎀 Optional: Add pearls, ribbons, and bows to enhance elegance.
Step 8: Outline the Final Drawing
Once you’re happy with your sketch:
- Trace clean lines using a fine liner or dark pencil.
- Keep lines fluid and confident—avoid stiffness.
- Erase unnecessary construction lines.
Make sure each frill and fold looks distinct yet harmonious.
Step 9: Shading the Frilly Dress
Shading adds life to your drawing. Understanding where light falls is crucial.
- Choose a light source direction (e.g., top right).
- Shade opposite sides for shadows.
- Deepen areas under folds and where frills overlap.
- Keep lace and outer frills lighter for contrast.
- Blend using a blending stump for smooth gradients.
For realistic results, use at least three tones: light, medium, and dark.
Step 10: Coloring the Dress (Optional)
While most frilly dresses are white or pastel, color brings them to life.
Popular color schemes:
- Soft pink or lavender – sweet, romantic look.
- Ivory or cream – vintage and elegant.
- Baby blue or mint green – modern pastel tone.
- Red or gold – dramatic, regal design.
Use colored pencils or digital brushes. Shade darker at folds and lighter on raised areas for realistic lighting.
🌸 Tips for Drawing Realistic Frills and Fabric
To master how to draw a frilly dress, focus on the subtle flow of fabric. Here are expert tips:
- Observe real fabric folds—study how they bend and layer.
- Draw frills in perspective—closer ones appear larger, distant ones smaller.
- Keep rhythm in your ruffles—avoid mechanical repetition.
- Use varying line weight—thin for lace, thick for shadows.
- Add light reflections on satin or silk to make the material glow.
🎀 Different Styles of Frilly Dresses to Practice
To expand your artistic versatility, practice various frilly dress styles. Each teaches different techniques.
1. Princess Ball Gown
- Multiple tiers of large frills.
- Draw symmetrical, wide arcs from waist to floor.
2. Lolita Dress
- Mid-length skirt with tight, repetitive frills.
- Add lace, bows, and petticoat-like layers underneath.
3. Victorian or Rococo Gown
- High-necked bodice, puffed sleeves, and elegant layers.
- Focus on decorative patterns and embroidery.
4. Fairytale Dress
- Flowing frills with irregular patterns.
- Add dynamic motion as if caught in wind.
5. Modern Frilly Party Dress
- Shorter, structured layers.
- Mix straight edges with ruffles for fashion illustration style.
🧠 Common Mistakes to Avoid When Drawing a Frilly Dress
Even skilled artists can make errors when learning how to draw a frilly dress. Avoid these common issues:
- Uniform frills: Real ruffles vary slightly—avoid making all curves identical.
- Too many folds: Overcrowding hides design clarity.
- Flat shading: Without contrast, the dress looks lifeless.
- Incorrect body proportion: Always ensure the body under the dress is balanced.
- No motion: Add light curve flow to make fabric appear alive.
🪞 How to Draw Frills in Motion
Frills look most realistic when they follow natural gravity and movement.
- When the character is walking, frills tilt backward slightly.
- During a twirl, frills spread outward and lift.
- When the dress rests, frills droop downward softly.
Always keep frill direction consistent with your figure’s pose and motion flow.
🧵 Advanced Techniques for How to Draw a Frilly Dress
If you want to take your drawings beyond beginner level, try these advanced methods.
1. Layer Transparency
Use faint overlapping lines to show see-through chiffon or organza frills.
2. Digital Highlighting
In digital tools like Procreate or Photoshop, use a soft brush for highlights on satin textures.
3. Depth Contrast
Darken inner folds and brighten outer curves to make layers appear 3D.
4. Dynamic Posing
Practice with different angles—side view, top-down, or spinning perspective.
5. Combine Materials
Mix frills with tulle, lace, or ribbons for a realistic and creative combination.
🎨 Practicing Fabric Textures
Knowing how to draw different fabrics helps you design diverse frilly dresses.
| Fabric Type | How to Draw It |
|---|---|
| Silk | Smooth, minimal lines with shiny highlights. |
| Lace | Tiny repetitive floral or mesh patterns. |
| Tulle | Transparent with light dotted texture. |
| Cotton | Matte shading, soft curved folds. |
| Satin | Deep contrast between light and shadow. |
Practicing fabric texture will make your drawings more lifelike and detailed.
💬 FAQs About How to Draw a Frilly Dress
Q1: How do I start drawing frills for beginners?
Start with a wavy line, add a parallel curve beneath it, and connect them with short curved strokes. Keep practicing different wave shapes for variety.
Q2: How many layers of frills should I draw?
It depends on your design. Typically, 3–6 layers for detailed dresses, fewer for minimal styles. Balance visual weight with elegance.
Q3: What pencil should I use for shading frills?
Use 2B or 4B pencils for deep shadows and HB for light areas. Blending helps create a soft, fabric-like texture.
Q4: How can I make my frilly dress look more dynamic?
Draw frills curving in different directions—upward, sideways, or twisted slightly—to show natural fabric flow and movement.
Q5: What is the easiest frilly dress style to draw?
An A-line frilly dress is simplest. It has basic shape and clear fold direction, perfect for beginners.
Q6: Can I color my frilly dress drawing digitally?
Yes. Digital drawing tools allow you to blend colors smoothly and add highlights for a realistic silk or satin look.
Q7: How do I show lace details without cluttering the design?
Use soft dotted or floral outlines instead of full detail. Focus on key lace edges—neckline, sleeves, and skirt hem.
Q8: How can I make the frills look fluffy and light?
Use gentle curves and wider spaces between folds. Keep shading soft and avoid sharp edges.
Q9: How do I draw frills from a side view?
Draw curved layers that overlap more on the near side and compress slightly on the far side. Use perspective to show depth.
Q10: How can I improve quickly at drawing frilly dresses?
Practice daily, study fabric reference photos, and experiment with different frill patterns. Try mixing styles (Victorian + modern) for creativity.
🌺 Conclusion: Mastering How to Draw a Frilly Dress Like a Professional
Learning how to draw a frilly dress opens the door to designing elegant, intricate outfits that convey motion and emotion. Every ruffle and curve tells a story of style and grace.
Remember these golden rules:
- Start with a balanced figure base.
- Build the silhouette before adding details.
- Use gentle wavy lines for frills, never rigid shapes.
- Layer, shade, and highlight strategically for realism.
- Keep practicing different styles—classic, vintage, or modern.
By mastering the techniques outlined in this guide, you’ll gain confidence in creating breathtaking frilly dress designs for fashion illustration, digital art, or animation. With consistent effort and imagination, your drawings will look as detailed and expressive as professional artwork.