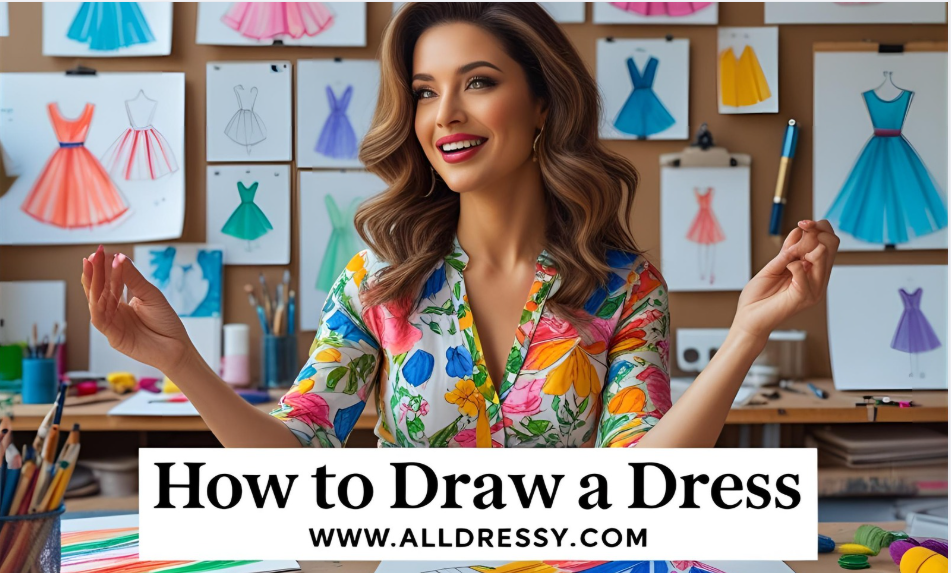
Fashion illustration is an art form that combines creativity, proportion, anatomy, and garment construction into a compelling visual representation. Among the many elements of fashion illustration, drawing a dress is one of the most iconic and expressive skills. Whether you are a beginner looking to break into fashion design or a seasoned artist aiming to sharpen your sketching skills, learning how to draw a dress effectively is fundamental. This comprehensive guide will walk you through every step of the process, from understanding garment structure to final rendering and shading.
1. Understanding the Fundamentals Before You Draw a Dress
Before you even put pencil to paper, it’s crucial to have a clear understanding of what a dress is in the context of fashion design.
What is a Dress?
A dress is a one-piece garment typically made for women or girls, consisting of a bodice (upper part) and a skirt (lower part). Dresses can range from simple and functional to ornate and haute couture. Each style brings with it a unique structure, fabric flow, and visual weight that must be translated accurately onto paper.
Tools You’ll Need
To draw a professional-quality dress, consider the following tools:
- Sketchpad or fashion croquis templates
- Pencils (HB for light sketching, 2B-6B for darker lines)
- Erasers (kneaded erasers work best for light lifting)
- Fine liners or ink pens
- Colored pencils or markers (optional)
- Ruler (for symmetrical details)
2. The Foundation: Drawing the Fashion Croquis
What is a Fashion Croquis?
A croquis is a basic sketch of the human body used as a template for designing clothes. The standard fashion croquis is stylized, usually 9–10 heads tall (elongated compared to the realistic human figure, which is about 7.5 heads tall). This gives garments a more elegant, high-fashion look.
Step-by-Step: Drawing the Croquis
- Draw a vertical center line – This will act as your axis of symmetry.
- Mark the head – Start with an oval at the top of the line.
- Segment the body into equal “head-length” parts: chest, waist, hips, thighs, knees, calves, and feet.
- Sketch the torso and hips – Use hourglass curves. Don’t forget to define the waist.
- Add the limbs – Arms and legs should be long and elegant.
- Lightly define joints – Shoulders, elbows, knees, and ankles.
Pro Tip: You can also download croquis templates online and trace them until you’re comfortable drawing them freehand.
3. Concept Development: Visualizing the Dress
Before diving into sketching the actual garment, take time to define your concept. This includes:
a. Silhouette
The silhouette is the overall shape of the dress. Common silhouettes include:
- A-line – Flares from the waist
- Ball gown – Very full skirt, fitted bodice
- Mermaid – Fitted through the body, flares at the knee
- Sheath – Straight and narrow
- Empire waist – Raised waistline below bust
- High-low – Asymmetrical hemline
b. Style Elements
Design elements give character to your dress:
- Neckline (V-neck, halter, off-shoulder, boat neck)
- Sleeves (cap sleeves, puff sleeves, long sleeves, sleeveless)
- Hemline (mini, midi, maxi, asymmetrical)
- Back design (open back, zipper, lace-up)
c. Fabric and Texture
The fabric impacts the weight and movement of your dress drawing:
- Chiffon and tulle – Lightweight and flowy
- Satin and silk – Smooth with a natural shine
- Cotton and jersey – Casual and structured
- Lace and net – Decorative and sheer
Keep this in mind when drawing folds, pleats, and drapes.
4. Drawing the Dress Step-by-Step
Now that your croquis is ready and your concept is in place, let’s draw the dress.
Step 1: Light Pencil Outline Over the Croquis
Begin by lightly outlining the dress over your croquis using an HB pencil. This first outline sets the shape and placement of the dress.
- Use curved lines to reflect natural body contours.
- For loose or flared dresses, let the lines extend outward from the body.
- Tight-fitting dresses will follow the croquis closely.
Step 2: Add the Neckline and Shoulder Design
Refine the neckline and add shoulder features:
- For off-shoulder or strapless designs, make sure to show collarbones.
- For collared dresses, draw the lapel and the fold lines.
- Pay attention to symmetry; use a ruler if necessary.
Step 3: Sketch Sleeves or Armholes
Sleeves drastically change the dress’s silhouette:
- Cap sleeves are short and rounded.
- Puff sleeves have extra volume and often elastic at the hem.
- Long sleeves may be tight or flared at the wrists (bell sleeves).
Draw light construction lines if you’re unsure about sleeve placement.
Step 4: Define the Waist and Bodice Details
Add darts, seams, or waistbands to shape the bodice.
- For an empire waist, draw the horizontal seam just below the bust.
- Add buttons, zippers, or decorative elements like lace or mesh panels.
Use reference images if you’re working from a real-world inspiration.
Step 5: Draw the Skirt Section
This is where the dress comes alive. Sketch the flow and volume:
- Use long curved lines for flowing skirts.
- Add pleats or gathers to create depth and realism.
- For structured skirts, use angular lines.
To create motion, curve the bottom hem and lift one side slightly to simulate movement.
Step 6: Add Fabric Folds and Draping
This step adds realism. Think about where the dress would naturally wrinkle or fold:
- Around the waist
- At the hem
- At the elbow or shoulder
- Where the dress flares or pinches
Use gentle lines; folds should be lighter and more organic than seam lines.
5. Inking and Refining the Dress Illustration
Once the pencil sketch is finalized, it’s time to ink.
Tips for Inking:
- Use a fine liner (0.1mm or 0.3mm) for contour lines.
- Thicker pens (0.5mm or 0.8mm) can be used for outer edges.
- Use dashed or dotted lines for stitching.
- Be patient and steady. Let the ink dry completely before erasing pencil lines.
Proportional Detailing
Refine small elements such as:
- Buttons, embroidery, lace patterns
- Texture indicators (e.g., dots for chiffon, diagonal lines for denim)
- Accessories like belts, bows, and trim
6. Rendering the Dress: Coloring and Shading
a. Choosing the Right Colors
- Pick colors that align with your concept (seasonal, casual, formal, bridal).
- Use colored pencils or markers, but test them on another sheet first.
- Blending colors can help reflect realistic shading and lighting.
b. Shading Techniques
Add shading to emphasize form and light source. Common shading methods include:
- Hatching – Parallel lines
- Cross-hatching – Intersecting lines
- Stippling – Dots for subtle shading
- Gradient blending – Using lighter to darker tones
Pay attention to where the light hits:
- The highest points (bust, shoulders, hips) will be lighter.
- Areas under folds, inside pleats, and behind limbs will be darker.
Use shading to add movement, especially in flowing fabrics like chiffon or silk.
7. Fabric Texture Illustration Techniques
Different fabrics behave differently, and showing this is crucial in a professional fashion illustration.
Chiffon or Tulle
- Use light, delicate strokes.
- Emphasize transparency by allowing some croquis details to show through.
Satin or Silk
- Use highlights to show sheen.
- Shade with soft gradients to reflect the smoothness.
Lace
- Add tiny, intricate patterns. Use fine pens and focus on symmetry.
- Indicate sheerness by partially showing the croquis underneath.
Denim or Cotton
- Use solid coloring and visible seam lines.
- Add top-stitching and structured folds.
8. Final Touches and Presentation
Background and Pose
Add background elements for mood (optional):
- A runway
- A spotlight
- A seasonal theme (e.g., winter snow or spring garden)
Use a dynamic pose to enhance the garment’s movement and make the dress more appealing. Avoid static poses unless you’re creating a flat technical drawing.
Sign and Scan
- Sign your work discreetly.
- Scan at high resolution if you’re creating a digital portfolio.
- Clean up the scan using software like Photoshop or Procreate (optional).
9. Digital Dress Drawing
Many designers now use digital tools such as Procreate, Adobe Illustrator, or Sketchbook.
Benefits of Digital Drawing:
- Undo mistakes easily
- Use layers for more flexibility
- Add digital textures and brushes (e.g., fabric brushes)
- Easy color manipulation and background changes
Learn the basics of digital sketching if you’re planning a professional career or online portfolio.
10. Practice: Variations and Iterations
Great designers sketch dozens of variations for a single concept.
- Try the same dress in different colors.
- Experiment with fabric changes.
- Alter hem lengths, sleeve styles, or necklines.
- Create a collection of dresses with a unifying theme.
Save all iterations to track progress and generate fresh ideas.
11. Bonus: Drawing Dresses for Different Body Types
While the fashion croquis is elongated, learning to draw dresses for real-world body types is crucial:
- Curvy figures: Emphasize waist, hips, and bust.
- Petite: Create vertical lines to elongate.
- Tall: Balance long limbs with bold hem or shoulder details.
- Plus-size: Use curved lines to accentuate form while maintaining proportion.
This adds inclusivity and realism to your designs, making your portfolio more versatile and appealing.
This in-depth guide to drawing dresses combines artistic technique, fashion principles, and presentation strategies that go beyond basic tutorials. Whether you’re preparing a fashion portfolio, designing your first dress line, or exploring artistic expression, mastering how to draw a dress equips you with a timeless skill that bridges creativity and craftsmanship.
Here are some Frequently Asked Questions (FAQs) to complement your guide on drawing dresses:
🖌️ FAQs: How to Draw a Dress
1. How do I choose the best croquis proportions?
Most illustrators use a 9–10 head figure to showcase garments elegantly. This exaggerated proportion enhances silhouettes. An 8½-head figure gives a more realistic appearance. It’s worth experimenting—fashion proportions can vary to suit your style (specifydev.uog.edu, adobe.com).
2. Should I use flat sketches or fashion illustrations?
Flat sketches (tech pack flats) are technical and essential for pattern-making, showing precise seams and measurements. Fashion illustrations, in contrast, emphasize movement, texture, and mood—perfect for concept exploration, marketing, or editorial visuals (hellointern.in).
3. What are effective tools for drawing dresses?
- Traditional tools: graphite pencils (HB–6B), fine liners, markers, colored pencils, erasers, blending stumps, and smooth paper (amordesign.org).
- Digital tools: tablets (e.g., iPad Pro with Apple Pencil, Wacom), apps like Procreate, Adobe Illustrator/Fresco, Sketchbook, and 3D garment tools like CLO3D (amordesign.org).
4. How can I show different fabric textures convincingly?
- Flowy fabrics (chiffon, tulle): use light strokes and gentle folds.
- Shiny fabrics (satin, silk): emphasize gloss with soft gradients and highlights.
- Opaque or structured fabrics (cotton, denim): depict clear seam lines and firmer folds.
- Lace or knit: illustrate patterns or texture using fine lines and dots (hellointern.in, adobe.com).
5. How do I add depth with shading?
Use shading techniques like hatching, cross-hatching, stippling, and contour-based shading. Focus on light source direction: highlights where fabric stretches, shadows under folds and behind limbs (hellointern.in).
6. How can I develop my personal illustration style?
- Define your visual voice: look to illustrators like Rene Gruau, Hayden Williams, Zoe Hong—find what resonates.
- Choose a focus: whether it’s editorial flair, minimalistic lines, or detailed technical drawing (adobe.com, aaofd.com).
- Experiment with media: test pencils, markers, charcoal, watercolors, gouache, or digital brushes to find what enhances your expression .
7. How do I practice effectively to improve?
- Trace existing croquis then move to freehand.
- Sketch diverse collars, necklines, sleeves, and skirt styles.
- Observe real people or models to study fabric behavior and movement (reddit.com, specifydev.uog.edu).
8. What’s the process for dressing the croquis?
- Lightly draw the dress outline over the croquis.
- Define neckline, waist, sleeves, hem.
- Add details—darts, pleats, buttons.
- Ink the sketch and refine.
- Render with shading, texture, and color (aaofd.com).
9. Flat sketches vs. fashion figures—when to use each?
- Flat sketches are for technical clarity—used in production and pattern development.
- Fashion figures capture emotion, movement, and texture—ideal for concept, portfolio, and marketing (hellointern.in, upskillist.com).
10. How important is networking and learning from professionals?
Crucial! Engaging with other illustrators—via classes, events, online forums, or industry gatherings—helps you learn faster, get feedback, and open opportunities .
✨ Conclusion
Drawing a dress—whether for concept or production—involves skilful integration of anatomy, garment structure, and artistic detail. Start with a well-proportioned Iroquois (9-head for stylised, 8½-head for realism), visualise your design concept (silhouette, neckline, fabric type), and proceed through refined stages: sketching, detailing, inking, shading, and rendering. Understanding fabric behaviour and mastering shading deepen the realism and flow of your designs. Experiment across media—from traditional pencils and markers to digital tools like Procreate and Illustrator—to discover your unique aesthetic. Practice is key: sketch varied styles, trace and freehand Iroquois, study real movement, and iterate constantly. Finally, connect with other illustrators, learn from peers and mentors, and build your professional network. With dedicated effort and creative flair, your dress illustrations will evolve into powerful visual narratives that communicate design intent, emotion, and style.