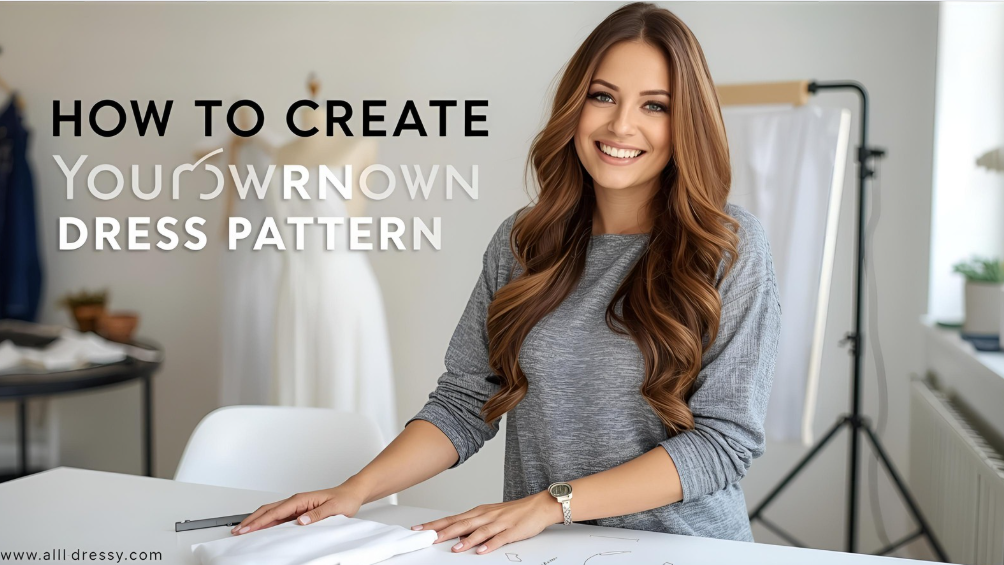
Creating a dress from scratch is a fulfilling and creative endeavor. Learning how to create your own dress pattern allows you to design clothing that perfectly fits your body, matches your personal style, and expresses your creativity. Unlike using ready-made patterns, creating your own pattern gives you total control over design, fit, and fabric choice.
This guide covers everything from measuring, drafting, and fabric selection to advanced techniques like pattern modifications and adjustments for different body types. By following these steps, you’ll gain the skills to design custom dresses that are stylish, professional-looking, and uniquely yours.
1. Understanding Dress Patterns
Before diving into creation, it’s important to understand what a dress pattern is.
1.1 What is a Dress Pattern?
A dress pattern is a template or blueprint used to cut fabric pieces that will be sewn together to create a garment. Patterns include key elements like:
- Bodice (upper part)
- Skirt (lower part)
- Sleeves and collars
- Seam allowances
- Dart placements for shaping
1.2 Types of Dress Patterns
- Basic Block Patterns: Simple shapes used as a foundation.
- Commercial Patterns: Ready-made designs available in stores or online.
- Custom Drafted Patterns: Tailor-made based on individual body measurements.
Learning how to create your own dress pattern allows you to bypass off-the-rack limitations and design unique garments.
2. Essential Tools for Creating Dress Patterns
Having the right tools ensures accuracy and precision:
- Measuring Tape: For accurate body measurements.
- Rulers and French Curves: For drawing straight and curved lines.
- Pattern Paper: Tracing paper or kraft paper for drafting patterns.
- Pencils and Erasers: For marking and adjusting lines.
- Scissors and Rotary Cutter: To cut pattern paper cleanly.
- Pins and Weights: To hold paper and fabric in place.
- Notcher and Awl: For marking darts, pleats, and seam notches.
3. Taking Accurate Measurements
Correct measurements are crucial for a well-fitting dress. Essential measurements include:
- Bust
- Waist
- Hips
- Shoulder width
- Back length
- Arm length (for sleeves)
- Neck circumference
- Dress length
Tip: Measure over fitted clothing or a bodysuit for accuracy. Use a mirror or a friend to ensure measurements are precise.
4. Drafting the Basic Bodice Pattern
The bodice forms the upper part of the dress and determines the fit. Follow these steps:
Step 1: Draw the Back Bodice
- Start with a vertical line equal to the back length.
- Draw a horizontal line at the top for shoulder width.
- Mark armhole depth, waistline, and bust points.
- Connect the points to form the side seam and shoulder seam.
Step 2: Draw the Front Bodice
- Similar to the back, but include neckline shaping (scoop, V-neck, or high neck).
- Add dart placements for bust shaping.
Step 3: Include Darts and Seams
- Darts help contour the fabric to the body.
- Standard placements include bust, waist, and shoulder darts.
5. Drafting the Skirt Pattern
The skirt pattern depends on the dress style: straight, A-line, circle, or pleated.
Step 1: Determine Skirt Length
- Measure from waist to desired hemline.
Step 2: Shape the Waist
- Add darts or pleats to fit the waist circumference.
Step 3: Decide Skirt Width
- For an A-line skirt, gradually increase width from waist to hem.
- For a circle skirt, calculate radius using waist measurement and skirt length.
Step 4: Add Seam Allowances
- Typically, 1.5 cm for seams and 3 cm for hems.
6. Drafting Sleeves
Sleeves can be set-in, raglan, or flutter sleeves, depending on the dress style.
Step 1: Measure Arm
- Measure upper arm circumference, arm length, and bicep width.
Step 2: Draw Sleeve Cap
- The sleeve cap should match the armhole of the bodice.
- Use a French curve for smooth lines.
Step 3: Add Seam Allowances
- Include extra space for hemming and sewing.
7. Combining Bodice, Skirt, and Sleeves
- Check that bust, waist, and hip measurements align across pattern pieces.
- Make adjustments for ease (extra space for movement).
- Double-check symmetry before cutting fabric.
8. Pattern Adjustments for Different Body Types
Custom patterns allow you to adapt dresses to different body shapes:
1. Pear-Shaped
- Add more flare to the skirt.
- Narrow the shoulders slightly for proportion.
2. Apple-Shaped
- Emphasize neckline and bust.
- Avoid tight waist darts; use empire waistlines.
3. Hourglass
- Highlight natural curves with darts and fitted waistlines.
4. Rectangle
- Create curves with strategically placed darts, pleats, and peplums.
9. Adding Design Details
Patterns can include unique elements for style:
- Necklines: scoop, V-neck, halter, high collar.
- Sleeves: puff, bell, cap, bishop.
- Skirt details: ruffles, pleats, layers.
- Back design: open back, keyhole, button-down.
Each detail requires modification of the basic pattern, which is easier once the foundational blocks are accurate.
10. Creating a Muslin or Test Garment
Before cutting expensive fabric, create a muslin test garment:
- Use cheap cotton fabric to assemble your dress.
- Check fit, proportions, and comfort.
- Mark any necessary adjustments on the pattern.
This step prevents costly mistakes and ensures your final garment is flawless.
11. Transferring Pattern to Final Fabric
Once satisfied with the muslin:
- Lay out your pattern on the fabric, aligning grain lines.
- Pin or weigh down pieces to prevent shifting.
- Cut carefully along the lines, including seam allowances.
- Mark darts, pleats, and notches using tailor’s chalk or fabric markers.
12. Sewing Tips for Your Custom Dress
- Start with basting stitches to check fit before final sewing.
- Use matching thread and proper needle type for your fabric.
- Press seams after each step for a professional finish.
- Finish raw edges with serging or zigzag stitching to prevent fraying.
13. Common Pattern-Making Mistakes
Avoid these errors to achieve a polished result:
- Skipping accurate measurements.
- Neglecting ease for comfort.
- Misaligning darts and seams.
- Forgetting grainline direction, which affects fabric drape.
- Ignoring test garments, leading to fit issues in final fabric.
14. Advanced Pattern Techniques
For experienced designers:
- Pattern Grading: Adjusting pattern sizes to fit multiple measurements.
- Adding Pleats and Gathers: Modify basic blocks for dynamic designs.
- Draping on a Dress Form: Create three-dimensional patterns directly on a mannequin.
- Using CAD Software: Digitally draft and adjust patterns for precision.
15. Pattern Storage and Organization
- Label each pattern piece clearly: front bodice, back bodice, sleeves, etc.
- Store in large envelopes or folders to prevent damage.
- Include notes on adjustments for future reference.
Proper storage ensures your custom patterns are reusable for multiple projects.
16. Incorporating Fabric Characteristics
When drafting patterns, consider fabric properties:
- Stretch Fabrics: Reduce ease and adjust seam allowances.
- Lightweight Fabrics: Avoid heavy darts; use gentle shaping.
- Heavy Fabrics: Add ease to prevent stiffness; consider seam finishes.
- Patterned Fabrics: Align prints with seams and darts for visual consistency.
17. Using Patterns for Dress Variations
Once you have a base pattern:
- Modify skirt length for mini, midi, or maxi dresses.
- Adjust neckline for casual, formal, or evening looks.
- Change sleeves for seasonal or stylistic variations.
This approach maximizes the versatility of a single pattern.
18. Learning from Professional Dressmakers
- Study commercial patterns to understand shaping techniques.
- Observe fit models to see how patterns translate to real bodies.
- Experiment with different fabrics and designs to enhance skill.
Professional insights accelerate your understanding of how to create your own dress pattern effectively.
19. Troubleshooting Common Issues
- Dress too tight/loose: Adjust darts, side seams, or ease.
- Sleeves don’t fit properly: Check armhole measurements and sleeve cap.
- Skirt hangs unevenly: Ensure waist and hemline alignment.
- Fabric puckering: Press seams carefully and check tension on the sewing machine.
20. Building Confidence in Pattern-Making
Creating your own dress pattern may seem complex at first, but with practice:
- Start with simple designs and gradually try advanced styles.
- Keep measurement accuracy as a priority.
- Use muslin samples for testing.
- Document all adjustments to build a personal pattern library.
Confidence grows with experience, experimentation, and attention to detail, enabling you to design beautiful, custom-fitted dresses consistently.
This comprehensive guide covers everything a beginner or intermediate designer needs to know about how to create your own dress pattern, including tools, measurements, drafting, adjustments, sewing, and troubleshooting. By mastering these steps, you can design unique, perfectly fitted dresses that reflect your personal style and creativity
FAQs About How to Create Your Own Dress Pattern
1. Do I need experience to create my own dress pattern?
No. Beginners can start with basic block patterns and simple designs. With practice, you can gradually draft more complex patterns and make precise adjustments.
2. What is the difference between a block pattern and a custom pattern?
A block pattern is a basic template used as a starting point, while a custom pattern is tailored to your individual measurements and style preferences for a perfect fit.
3. How important are accurate measurements?
Extremely important. Accurate measurements ensure your dress fits correctly, prevents alterations later, and allows you to create garments that are both comfortable and stylish.
4. Can I modify an existing pattern to make my own?
Yes. You can adjust commercial patterns by changing lengths, widths, neckline shapes, sleeves, and other details to create a custom design that fits your body and style.
5. What type of paper should I use for drafting patterns?
Use pattern paper, tracing paper, or kraft paper. These are sturdy enough to handle repeated adjustments and allow you to mark lines, darts, and seam allowances clearly.
6. How do I test my pattern before cutting expensive fabric?
Make a muslin or test garment using cheap fabric. This allows you to check fit, proportions, and comfort. Adjust the pattern as needed before using your final fabric.
7. How do I store my patterns for future use?
Label each piece clearly and store in large envelopes, folders, or binders. Include notes on adjustments so you can reuse patterns for future projects.
8. Can I create patterns for different dress styles using one base pattern?
Yes. Once you have a basic bodice and skirt block, you can modify it for A-line, pencil, maxi, or cocktail dresses, changing details like neckline, sleeve, or length.
9. How do fabric choices affect pattern adjustments?
Different fabrics behave differently. Stretch fabrics require less ease, while heavy fabrics may need additional ease and seam adjustments. Always consider fabric properties when creating a pattern.
10. Are there digital tools for creating dress patterns?
Yes. CAD software and pattern-making apps allow precise digital drafting, grading, and modifications, making it easier to experiment with designs and adjustments before cutting fabric.
Conclusion
Learning how to create your own dress pattern is an invaluable skill for any aspiring designer or sewing enthusiast. By mastering accurate measurements, drafting techniques, pattern adjustments, and fabric considerations, you gain complete control over garment design and fit.
Creating custom patterns allows you to express your personal style, ensure perfect fit, and explore a variety of dress designs. From simple block patterns to intricate fashion-forward designs, this skill transforms the sewing experience from following instructions to true garment artistry.
By practicing consistently, testing patterns with muslins, and experimenting with different styles and fabrics, you can confidently design dresses that are stylish, unique, and professionally finished. With these skills, your wardrobe or fashion projects will reflect both creativity and precision, making every dress you create a masterpiece.