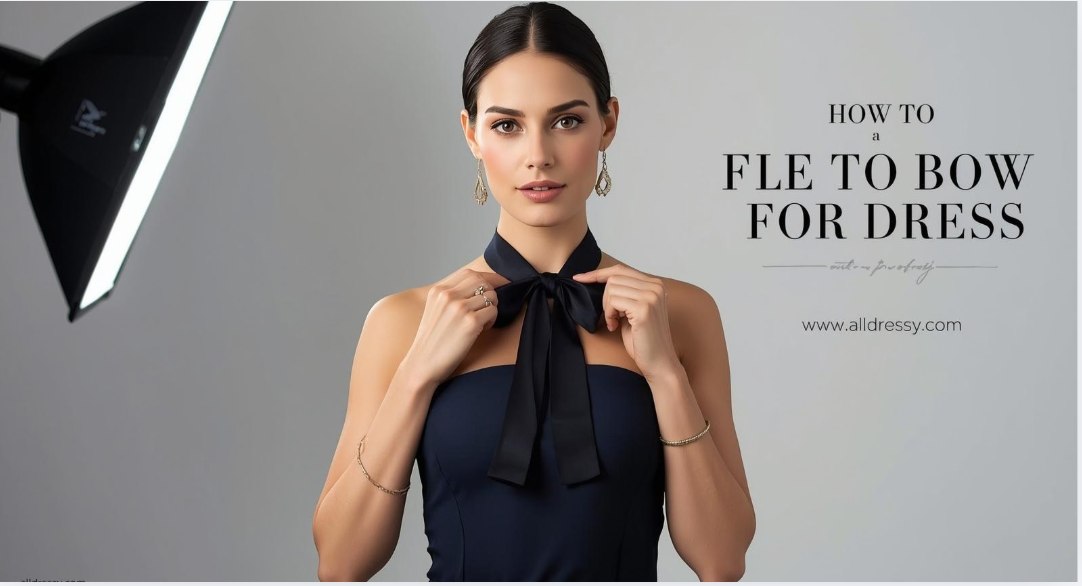
Learning how to tie a bow for dress is a small but powerful styling skill. A beautifully tied bow can transform an ordinary dress into a polished and elegant outfit. Whether it’s a sash bow on the back of an evening gown, a decorative bow on a waist belt, or a bow accent on a party dress, mastering how to tie a bow for dress ensures your outfit looks neat, balanced, and stylish.
Many people struggle with uneven loops, loose bows, or bows that slip out of place. The truth is that tying a perfect bow is a combination of technique, symmetry, and fabric awareness. Once you understand the right steps, how to tie a bow for dress becomes quick and easy.
This comprehensive guide explains everything you need to know about how to tie a bow for dress, including different bow styles, detailed step-by-step instructions, tips for different fabrics, and professional styling tricks used by fashion experts.
Why Learning How to Tie a Bow for Dress Matters

Knowing how to tie a bow for dress is more important than many people realize. A bow is often the centerpiece of a dress design, especially for formalwear, bridesmaid dresses, party dresses, and children’s clothing.
Here are some reasons why mastering how to tie a bow for dress matters:
1. Enhances the Overall Look
A symmetrical bow instantly adds elegance and sophistication to any dress. When you know how to tie a bow for dress properly, the garment looks more refined and stylish.
2. Improves Dress Fit
Many dresses use sash bows to cinch the waist. Correctly tying the bow ensures the dress stays fitted and flattering.
3. Prevents Wardrobe Mishaps
Loose bows can slip or fall apart. Learning how to tie a bow for dress properly keeps everything secure throughout the day.
4. Adds Personal Style
Different bow styles create different aesthetics. A large dramatic bow creates a bold statement, while a small delicate bow offers a subtle feminine touch.
Different Types of Dress Bows
Before learning how to tie a bow for dress, it’s important to understand the various bow styles used in fashion.
Classic Dress Bow
The classic bow is the most common style used on dresses. It features two loops and two hanging tails.
This style is commonly used on:
- Wedding dresses
- Evening gowns
- Bridesmaid dresses
- Party dresses
The classic bow is simple, elegant, and timeless.
Butterfly Bow
The butterfly bow is fuller and more dramatic. The loops are larger and slightly spread apart, resembling butterfly wings.
This type of bow works beautifully for:
- Ball gowns
- Formal dresses
- Statement outfits
When learning how to tie a bow for dress, the butterfly bow is ideal when you want a glamorous look.
Flat Decorative Bow
A flat bow sits closely against the dress and is often used purely for decoration rather than adjusting the fit.
This style is common on:
- Casual dresses
- Summer dresses
- Children’s clothing
Flat bows are smaller but still add charm and detail.
Double Bow
A double bow features layered loops, making it look fuller and more luxurious.
This bow style is popular in:
- Bridal fashion
- Couture dresses
- Designer gowns
When mastering how to tie a bow for dress, the double bow is an advanced technique that creates a very polished finish.
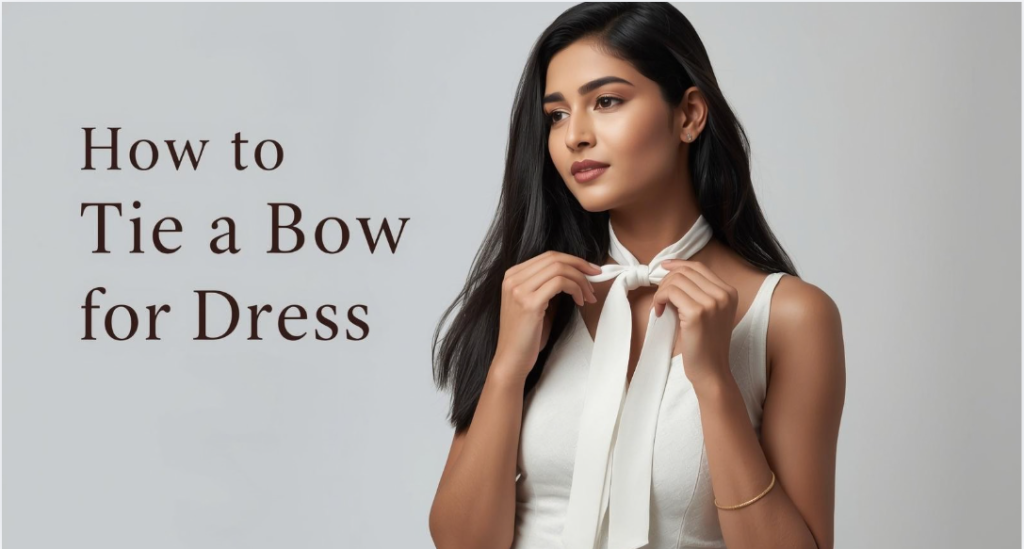
Step-by-Step Guide: How to Tie a Bow for Dress
Now let’s walk through the complete method for how to tie a bow for dress using the classic bow technique.
Step 1: Start With Even Ends
Hold both ends of the dress sash or ribbon.
Make sure both sides are equal in length before starting. This ensures the bow will look symmetrical.
Step 2: Cross the Straps
Cross the right strap over the left strap.
Pull it underneath to create the base knot, just like tying shoelaces.
Tighten gently so the dress fits comfortably around the waist.
Step 3: Create the First Loop
Take one strap and fold it into a loop.
This loop will become one side of the bow.
Hold the loop securely between your fingers.
Step 4: Wrap the Other Strap Around
Take the second strap and wrap it around the center of the loop you created.
This forms the middle knot of the bow.
Step 5: Form the Second Loop
Push the strap through the opening behind the first loop.
Pull it gently to form the second loop.
You now have two loops and two tails.
Step 6: Adjust the Bow
Pull both loops carefully to tighten the bow.
Adjust the size of the loops so they match.
Smooth the tails so they hang neatly.
At this point, you have successfully learned how to tie a bow for dress using the classic bow method.
How to Tie a Bow for Dress Behind Your Back
Many dresses require tying the bow behind your back, which can be challenging.
Here are professional tips to make it easier:
Use a Mirror
Stand in front of a mirror with another mirror behind you. This helps you see the bow as you tie it.
Tie a Loose Knot First
Start with a loose knot so you can adjust the tension before finishing the bow.
Pre-Shape the Loops
Create one loop first before reaching behind your back. This simplifies the process.
Ask for Assistance
For formal dresses like bridal gowns, having someone help ensures the bow is perfectly positioned.
How to Tie a Perfect Bow for Different Dress Fabrics
Fabric type greatly affects how easy it is to tie a bow.
Understanding fabric behavior helps you master how to tie a bow for dress more effectively.
Satin Dresses
Satin is smooth and slippery, making bows prone to loosening.
Tips:
- Tie the base knot tightly
- Double knot before forming loops
- Adjust gently to avoid wrinkles
Chiffon Dresses
Chiffon is lightweight and delicate.
Tips:
- Make larger loops to create volume
- Handle gently to avoid tearing
- Keep tails slightly longer
Cotton Dresses
Cotton fabric is easy to manage and holds bows well.
Tips:
- Use balanced loops
- Iron the sash before tying
- Ensure the center knot is tight
Velvet Dresses
Velvet bows look luxurious but require care.
Tips:
- Avoid excessive pulling
- Shape loops carefully
- Smooth the fabric before tightening
Professional Styling Tips for a Perfect Dress Bow
Fashion stylists use several tricks when tying bows on dresses.
These techniques can elevate your results when practicing how to tie a bow for dress.
Keep Loops Even
Symmetry is key to a beautiful bow.
Both loops should be approximately the same size.
Angle the Bow Slightly
Instead of keeping the bow completely flat, tilt it slightly upward for a more natural appearance.
Fluff the Loops
After tying the bow, gently fluff the loops with your fingers.
This creates a fuller, more elegant shape.
Trim Uneven Tails
If the ribbon tails are uneven, adjust or fold them neatly.
Balanced tails improve the overall look.
Common Mistakes When Learning How to Tie a Bow for Dress
Many people struggle when learning how to tie a bow for dress because of simple mistakes.
Avoid these common problems:
Uneven Ribbon Lengths
Starting with uneven straps results in a crooked bow.
Always begin with equal lengths.
Pulling Too Tight
Over-tightening can flatten the bow and ruin the shape.
Tighten gradually instead.
Small Loops
Tiny loops make the bow look awkward.
Create loops large enough to be visible and balanced.
Twisted Fabric
Ensure the sash or ribbon is flat before tying.
Twists can make the bow look messy.
Creative Bow Styles for Dresses
Once you master the basics of how to tie a bow for dress, you can experiment with more creative bow styles.
Side Waist Bow
Instead of tying the bow at the back, place it slightly on the side of the waist.
This adds a modern fashion twist.
Oversized Statement Bow
Large bows are trending in fashion.
They create a bold, dramatic appearance and are perfect for formal events.
Mini Decorative Bow
Small bows near the neckline or shoulder straps add subtle charm to dresses.
Layered Bow
A layered bow uses multiple ribbons to create extra fullness.
This style is often seen in designer dresses.
How to Keep Your Dress Bow Looking Perfect All Day
After learning how to tie a bow for dress, maintaining the bow throughout the day is just as important.
Use Fabric Spray
Light fabric spray can help bows hold their shape.
Pin the Center
For important events, a hidden safety pin inside the knot can keep the bow secure.
Avoid Excessive Movement
Too much pulling or leaning can loosen the bow.
Retie if Needed
If the bow becomes loose, quickly retie it to maintain a polished appearance.
Advanced Techniques for Tying Dress Bows
Fashion professionals often use advanced techniques when tying bows on dresses.
Structured Bow Technique
Insert light interfacing inside the sash before tying.
This creates a firm, sculpted bow.
Hidden Knot Method
Tie a small knot inside the loops to keep them from slipping.
This is useful for slippery fabrics.
Layered Loop Method
Instead of two loops, create multiple loops for a fuller bow.
This technique is commonly used in couture dresses.
Final Thoughts on Mastering How to Tie a Bow for Dress
Mastering how to tie a bow for dress is a simple yet valuable skill that enhances the beauty of many garments. Whether you’re dressing for a wedding, a party, or a casual event, a perfectly tied bow adds elegance and personality to your outfit.
With practice, the steps for how to tie a bow for dress become second nature. By understanding bow styles, fabric behavior, and professional styling tips, you can consistently create bows that look polished and fashionable.
The more you practice tying bows on different dresses and fabrics, the easier it becomes to achieve perfect loops, balanced tails, and a beautifully styled bow that elevates your entire outfit.
FAQs About How to Tie a Bow for Dress
What is the easiest way to learn how to tie a bow for dress?
The easiest way to learn how to tie a bow for dress is by practicing the classic bow technique, which is similar to tying shoelaces. Start by crossing the two ends of the dress sash, tying a simple knot, creating one loop, and wrapping the other end around it to form the second loop. Practicing with a ribbon or belt in front of a mirror can help you quickly improve your technique and create a symmetrical bow.
How do I keep a dress bow from coming undone?
If your bow frequently loosens, there are several ways to keep it secure. First, tighten the base knot before forming the loops. Second, ensure the fabric is flat and not twisted. For slippery materials like satin, you can tie a small double knot before shaping the bow. Some people also discreetly use a small safety pin behind the knot to keep the bow in place during long events.
Can I tie a bow on a dress by myself?
Yes, you can tie a bow on a dress by yourself, even if it is located on the back. Using a mirror is very helpful because it allows you to see the bow as you tie it. Many people also pre-form one loop before reaching behind their back, which makes the process easier. With practice, tying a bow independently becomes much faster and more natural.
Why does my dress bow look uneven?
An uneven bow usually happens when the two sash ends are not the same length at the start. It can also occur if one loop is pulled tighter than the other. To fix this, begin with equal ribbon lengths and adjust both loops slowly while tightening the bow. Taking a moment to fluff and balance the loops will help create a more symmetrical and attractive result.
How big should the loops be when tying a bow for a dress?
The loop size depends on the style of the dress and the length of the sash. For most dresses, medium-sized loops look balanced and elegant. However, formal gowns sometimes feature oversized bows for dramatic effect, while casual dresses may use smaller bows for a subtle touch. The key is to keep both loops the same size so the bow appears neat and proportional.
What fabrics are easiest for tying dress bows?
Cotton, linen, and structured polyester fabrics are usually the easiest materials for tying bows because they hold their shape well. Slippery fabrics like satin or silk can be more challenging because they tend to loosen easily. Lightweight fabrics such as chiffon may require slightly larger loops to create a fuller bow that stays visible and attractive.
Where should a bow be placed on a dress?
The most common placement for a dress bow is at the back waistline. This location creates a flattering silhouette and adds a classic decorative element. However, bows can also be tied at the side waist, front waist, shoulders, or neckline depending on the dress design. Each placement creates a slightly different fashion statement.
How can I make my dress bow look fuller?
To create a fuller bow, start by making larger loops and gently fluffing them after tying. You can also layer the loops slightly to create volume. For special occasions, some stylists lightly press the sash before tying the bow so the fabric holds its shape better.
Conclusion
Learning how to tie a bow for dress is a simple yet valuable fashion skill that can dramatically improve the appearance of many outfits. A well-tied bow adds elegance, balance, and charm to dresses ranging from casual summer styles to formal evening gowns. While the process may seem tricky at first, mastering the correct technique makes it easy to create beautiful bows every time.
By starting with evenly balanced sash ends, forming neat loops, and adjusting the bow carefully, anyone can achieve a polished and symmetrical result. Understanding how different fabrics behave also helps ensure that the bow stays secure and maintains its shape throughout the day.
With consistent practice and attention to small details, tying a bow becomes second nature. Whether it is a delicate decorative bow or a dramatic statement bow on the back of a formal dress, knowing how to tie a bow for dress allows you to elevate your style and present a perfectly finished look for any occasion.