
Tying a bow on a dress can elevate its appearance, add elegance, and provide a touch of personality to your outfit. Knowing how to tie a bow on a dress properly ensures that it looks symmetrical, secure, and stylish, whether it’s for casual wear, formal events, or special occasions. While bows may seem simple, mastering the technique requires attention to fabric, length, knot style, and placement.
In this guide, we will cover step-by-step instructions on how to tie a bow on a dress, including variations for different types of dresses, fabrics, and occasions. You’ll also learn expert tips to make your bow last longer, look professional, and complement your overall outfit.
Why Tying a Bow Properly Matters
Understanding how to tie a bow on a dress goes beyond aesthetics. A well-tied bow:
- Adds polish and sophistication to your look.
- Enhances the dress’s silhouette.
- Prevents loose or drooping bows that can appear messy.
- Provides a functional element for adjustable waist ties or decorative sashes.
A poorly tied bow can detract from the overall outfit, look asymmetrical, or even come undone during wear, so mastering the technique is essential.
Choosing the Right Fabric for Your Bow
Different fabrics behave differently when tied, so selecting the appropriate material is key:
- Silk or satin: Smooth and shiny, creates a formal and elegant bow, but can slip easily. Using a double knot helps secure it.
- Cotton: Offers structure, easy to handle, ideal for casual dresses or everyday wear.
- Chiffon or organza: Lightweight and flowy, suitable for airy, romantic styles; may require careful folding to maintain shape.
- Velvet: Adds texture and volume, perfect for evening dresses; thick fabric holds a bow well but may need more fabric for proportional loops.
- Knits or stretchy fabrics: May stretch out; tie loosely to avoid distorting the fabric.
Understanding fabric characteristics helps you adjust the tightness and method when learning how to tie a bow on a dress.
Step-by-Step Instructions on How to Tie a Bow on a Dress
1. Prepare the Dress
- Make sure the sash, ribbon, or fabric belt is flat and untwisted.
- Adjust the dress so that the bow will be in the desired position: waist, back, shoulder, or neckline.
2. Find the Center
- Hold both ends of the ribbon or sash.
- Bring them to the center front or back where you want the bow to sit.
- Ensuring symmetry at this stage is crucial for a balanced bow.
3. Make the First Knot
- Cross the right end over the left end.
- Pull the right end under the left end to create a simple knot.
- Tighten gently to secure the base of the bow without distorting the fabric.
4. Form the Loops
- Create a loop with the right end of the ribbon.
- Form a second loop with the left end.
- Adjust loop sizes according to your preference: small and neat for casual looks, large and voluminous for formal events.
5. Cross the Loops
- Cross the right loop over the left loop.
- Tuck the right loop under the left loop and pull it through to form the bow.
- Adjust tension carefully to maintain symmetry and shape.
6. Adjust the Bow
- Pull on the loops to even out size.
- Tighten the knot while keeping the loops full and rounded.
- Adjust the tails to desired length.
7. Secure the Bow
- For slippery fabrics, consider a double knot beneath the bow.
- Use discreet safety pins or small stitches if the bow must stay intact for long periods.
Different Types of Bows on Dresses
1. Classic Waist Bow
- Positioned at the natural waist.
- Enhances hourglass silhouette.
- Works well on A-line dresses, fit-and-flare styles, and wrap dresses.
2. Back Bow
- Tied at the back of the dress, often on evening gowns or formal wear.
- Adds elegance and decorative detail.
- Ensure bow is proportional to the dress and securely fastened to prevent slipping.
3. Shoulder Bow
- Positioned on one shoulder of sleeveless or one-shoulder dresses.
- Creates a statement focal point.
- Ideal for asymmetrical designs or cocktail dresses.
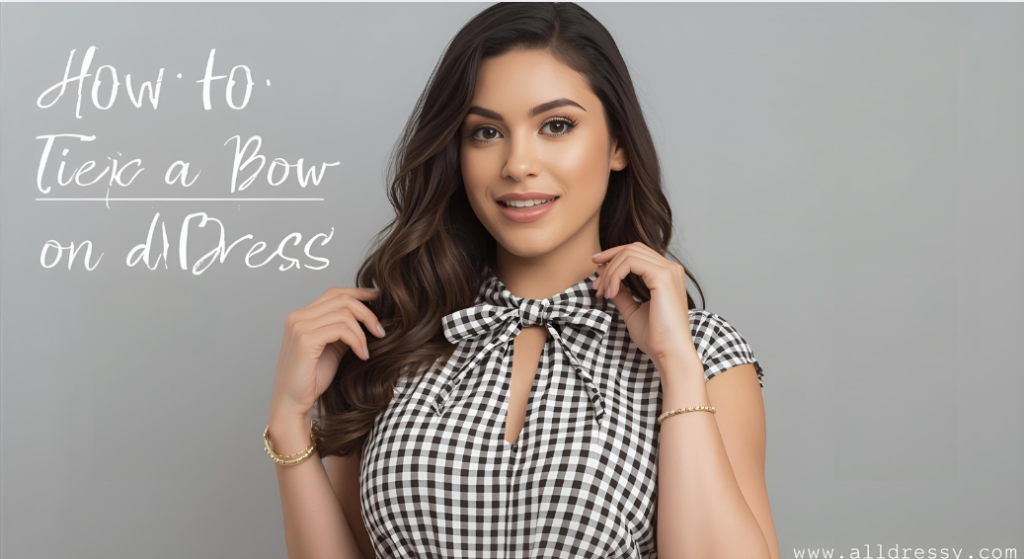
4. Neck Bow / Pussy Bow
- Tied at the neckline, often seen on blouses or shirt dresses.
- Adds sophistication and a vintage feel.
- Can be adjusted to create a neat or slightly loose, romantic look.
5. Hip Bow
- Positioned slightly above or to the side of the hips.
- Works well on fitted dresses or dresses with draped skirts.
- Creates visual interest and accentuates curves.
Bow Variations and Styling Ideas
- Double loop bow: Adds volume and elegance, ideal for formal gowns.
- Side knot bow: Slightly off-center for a modern, playful look.
- Asymmetrical bow: One loop larger than the other for creative styling.
- Tiny bow: Subtle accent on children’s dresses or casual wear.
- Layered bow: Stack multiple ribbons of different widths for a textured effect.
These variations allow you to customize bows for different occasions and dress styles.
Fabric Preparation Tips
- Iron or steam the sash before tying to remove wrinkles.
- Use interfacing for lightweight fabrics to help the bow hold shape.
- For slippery fabrics like satin, lightly starching the ribbon can increase stability.
- Fold edges neatly before tying to avoid frayed tails.
How to Maintain a Perfect Bow Throughout the Day
- Avoid tugging or pulling on the sash.
- Re-adjust periodically if the dress moves or the bow shifts.
- For back bows, discreetly use safety pins to anchor to the dress.
- When sitting or moving, smooth the loops and tails to retain shape.
Seasonal and Occasion Considerations
1. Formal Events
- Use satin, silk, or velvet ribbons for a luxurious appearance.
- Larger bows add drama for weddings, galas, or evening parties.
2. Casual or Daytime Dresses
- Cotton or linen bows offer a relaxed, effortless look.
- Smaller loops maintain simplicity and practicality.
3. Holiday or Festive Occasions
- Consider metallic ribbons or patterned sashes for a celebratory touch.
- Layered bows with complementary colors create a festive impression.
4. Children’s Dresses
- Lightweight fabrics with small, secure bows for comfort.
- Tails should be short enough to avoid tripping hazards.
Common Mistakes When Tying a Bow on a Dress
- Uneven loops or tails.
- Too tight or too loose, causing the bow to sag or come undone.
- Using a sash that is too narrow or too wide for the dress.
- Ignoring fabric type, resulting in slipping or distortion.
- Positioning the bow incorrectly, affecting the dress silhouette.
Troubleshooting Tips
- Bow slips: Double knot or use fabric tape for grip.
- Loops too small: Adjust length of sash and practice forming larger loops.
- Tails uneven: Trim after tying or fold the longer tail under for balance.
- Fabric fraying: Seal edges with fabric glue or fray-check.
- Too bulky: Reduce ribbon width or flatten loops carefully.
Adding Embellishments to Bows
- Small brooches or pins at the center for added sparkle.
- Embroidered or lace-edged ribbons for texture.
- Beaded or sequined sashes for evening wear.
- Contrasting colors to create a statement accent.
How to Tie a Bow on Wrap Dresses
- Wrap dresses require symmetrical bows at the side or back.
- Ensure the fabric wraps snugly around the waist before tying.
- Create loops large enough to complement the dress’s proportions.
- Adjust tails to flow naturally with the skirt or hemline.
How to Tie a Bow on a Belted Dress
- Use a belt that is long enough to create proportional loops and tails.
- Keep loops tight initially, then gently puff them for fullness.
- Center the bow to maintain balance or position slightly off-center for a modern look.
Quick Techniques for Beginners
- Start with narrow sashes for easier handling.
- Practice tying bows on a flat surface before wearing the dress.
- Use clips or pins to temporarily secure loops while adjusting.
- Repeat the process multiple times to achieve muscle memory and consistency.
Advanced Bow Styling
- Layering multiple ribbons of different textures for volume and interest.
- Incorporating pleats or folds in the fabric to create dimension.
- Combining small decorative bows with a larger main bow for multi-level styling.
- Using asymmetric loops and tails for avant-garde or couture-inspired looks.
How to Keep Bows Looking Fresh
- Steam or lightly iron before wearing.
- Avoid sitting directly on the bow to prevent flattening.
- Use lightweight fabric for daytime bows to reduce bulk.
- Refresh loops by gently pulling and adjusting throughout wear.
Conclusion of Techniques
Mastering how to tie a bow on a dress requires understanding fabric behavior, sash length, knot security, and loop size. By practicing basic and advanced techniques, exploring variations, and considering the occasion and fabric type, you can create bows that enhance the dress’s silhouette, add elegance, and reflect personal style. Properly tied bows remain secure, symmetrical, and stylish, making them a key accessory for
FAQs About How to Tie a Bow on a Dress
1. What type of fabric works best for tying a bow on a dress?
Silk, satin, velvet, and cotton are ideal. Silk and satin provide elegance but may slip, while cotton offers structure. Lightweight fabrics like chiffon require careful folding to maintain shape.
2. How can I make my bow symmetrical?
Center the sash, form equal-sized loops, and adjust the tails before tightening the knot. Using a mirror or practicing on a flat surface helps achieve symmetry.
3. How do I prevent the bow from coming undone?
Tie a double knot at the base or use discreet safety pins. For slippery fabrics, lightly starch the sash or use fabric tape for extra grip.
4. Where can I place a bow on a dress?
Common placements include the waist, back, shoulder, neckline, or hip. Placement depends on dress style and desired visual effect.
5. How do I tie a bow on a wrap dress?
Wrap the sash snugly around your waist, create loops proportional to the dress, and adjust tails to flow naturally with the skirt. Ensure the knot is secure but not too tight.
6. Can I use bows for formal and casual dresses?
Yes. Use larger, luxurious bows with satin or velvet for formal occasions, and smaller, structured bows with cotton or linen for casual wear.
7. How do I maintain the bow throughout the day?
Avoid tugging, periodically adjust loops and tails, and anchor back bows with pins if necessary. Lightly steam the bow before wearing for a fresh look.
8. Are there decorative options for bows?
Yes, you can add brooches, beads, lace, or layered ribbons for texture and visual interest. Contrasting colors can also create a statement accent.
9. How do I tie a bow on a belted dress?
Center the belt, form loops, tighten gently, and adjust tails for proportionality. Use a flat surface to practice if needed for perfect symmetry.
10. Can children wear dresses with bows safely?
Yes, but keep loops and tails short to avoid tripping hazards. Use lightweight, soft fabrics for comfort.
Conclusion
Mastering how to tie a bow on a dress adds elegance, personality, and style to any outfit. Whether for casual, formal, or festive occasions, a well-tied bow enhances the dress’s silhouette, ensures symmetry, and creates a polished appearance.
By selecting the right fabric, practicing knot techniques, adjusting loops and tails, and exploring variations like shoulder, back, hip, or neck bows, you can elevate your dressing game. Proper placement, secure tying, and occasional touch-ups ensure that your bow remains intact, stylish, and proportionate throughout wear.
Ultimately, knowing how to tie a bow on a dress is more than a practical skill—it’s a way to express personal style, add visual interest, and create a memorable fashion statement with minimal effort. A perfectly tied bow transforms an ordinary dress into a sophisticated, elegant, and eye-catching ensemble suitable for any occasion.